
Configuring Single Sign-on with Okta
Before configuring SSO with Okta, contact Tamr Support ([email protected]) for the following information:
- Identifier (Entity ID). This value begins with the string
urn:auth0:. - Reply URL (Assertion Consumer Service URL)
- Sign on URL. Note that this value is the same as the Reply URL.
After configuring SSO with Okta, send the following information to Tamr Support:
- Certificate (Base64)
- Login URL
To configure SSO with Okta:
-
Sign in to your Okta admin portal.
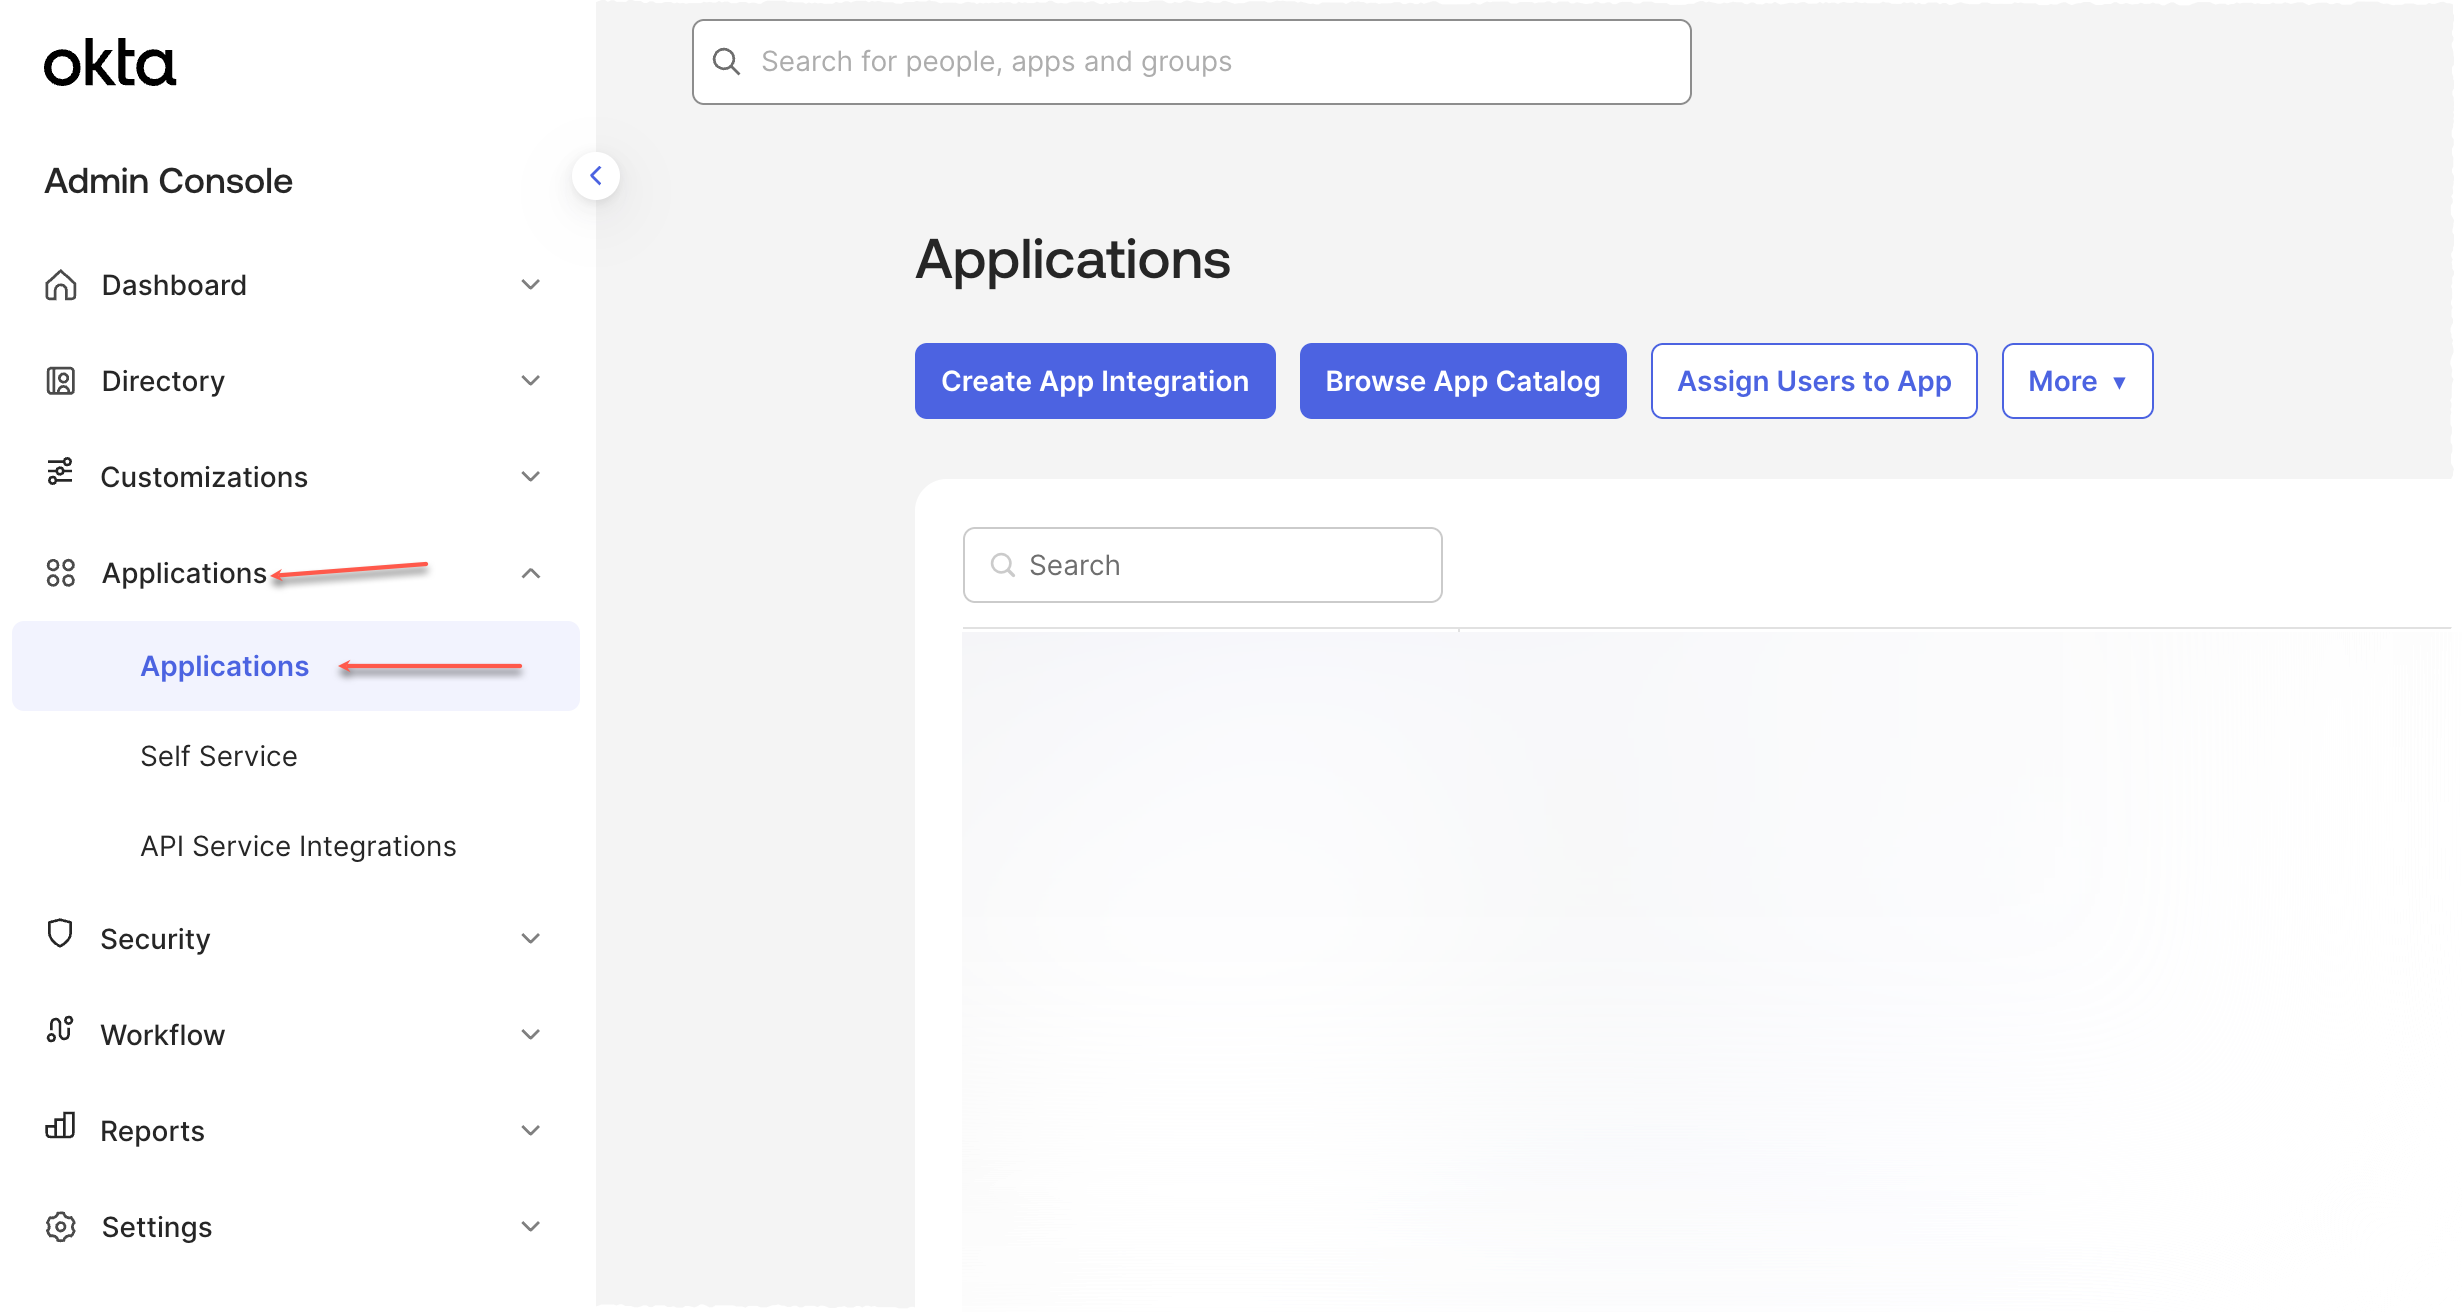
-
In the left menu bar, select Applications.
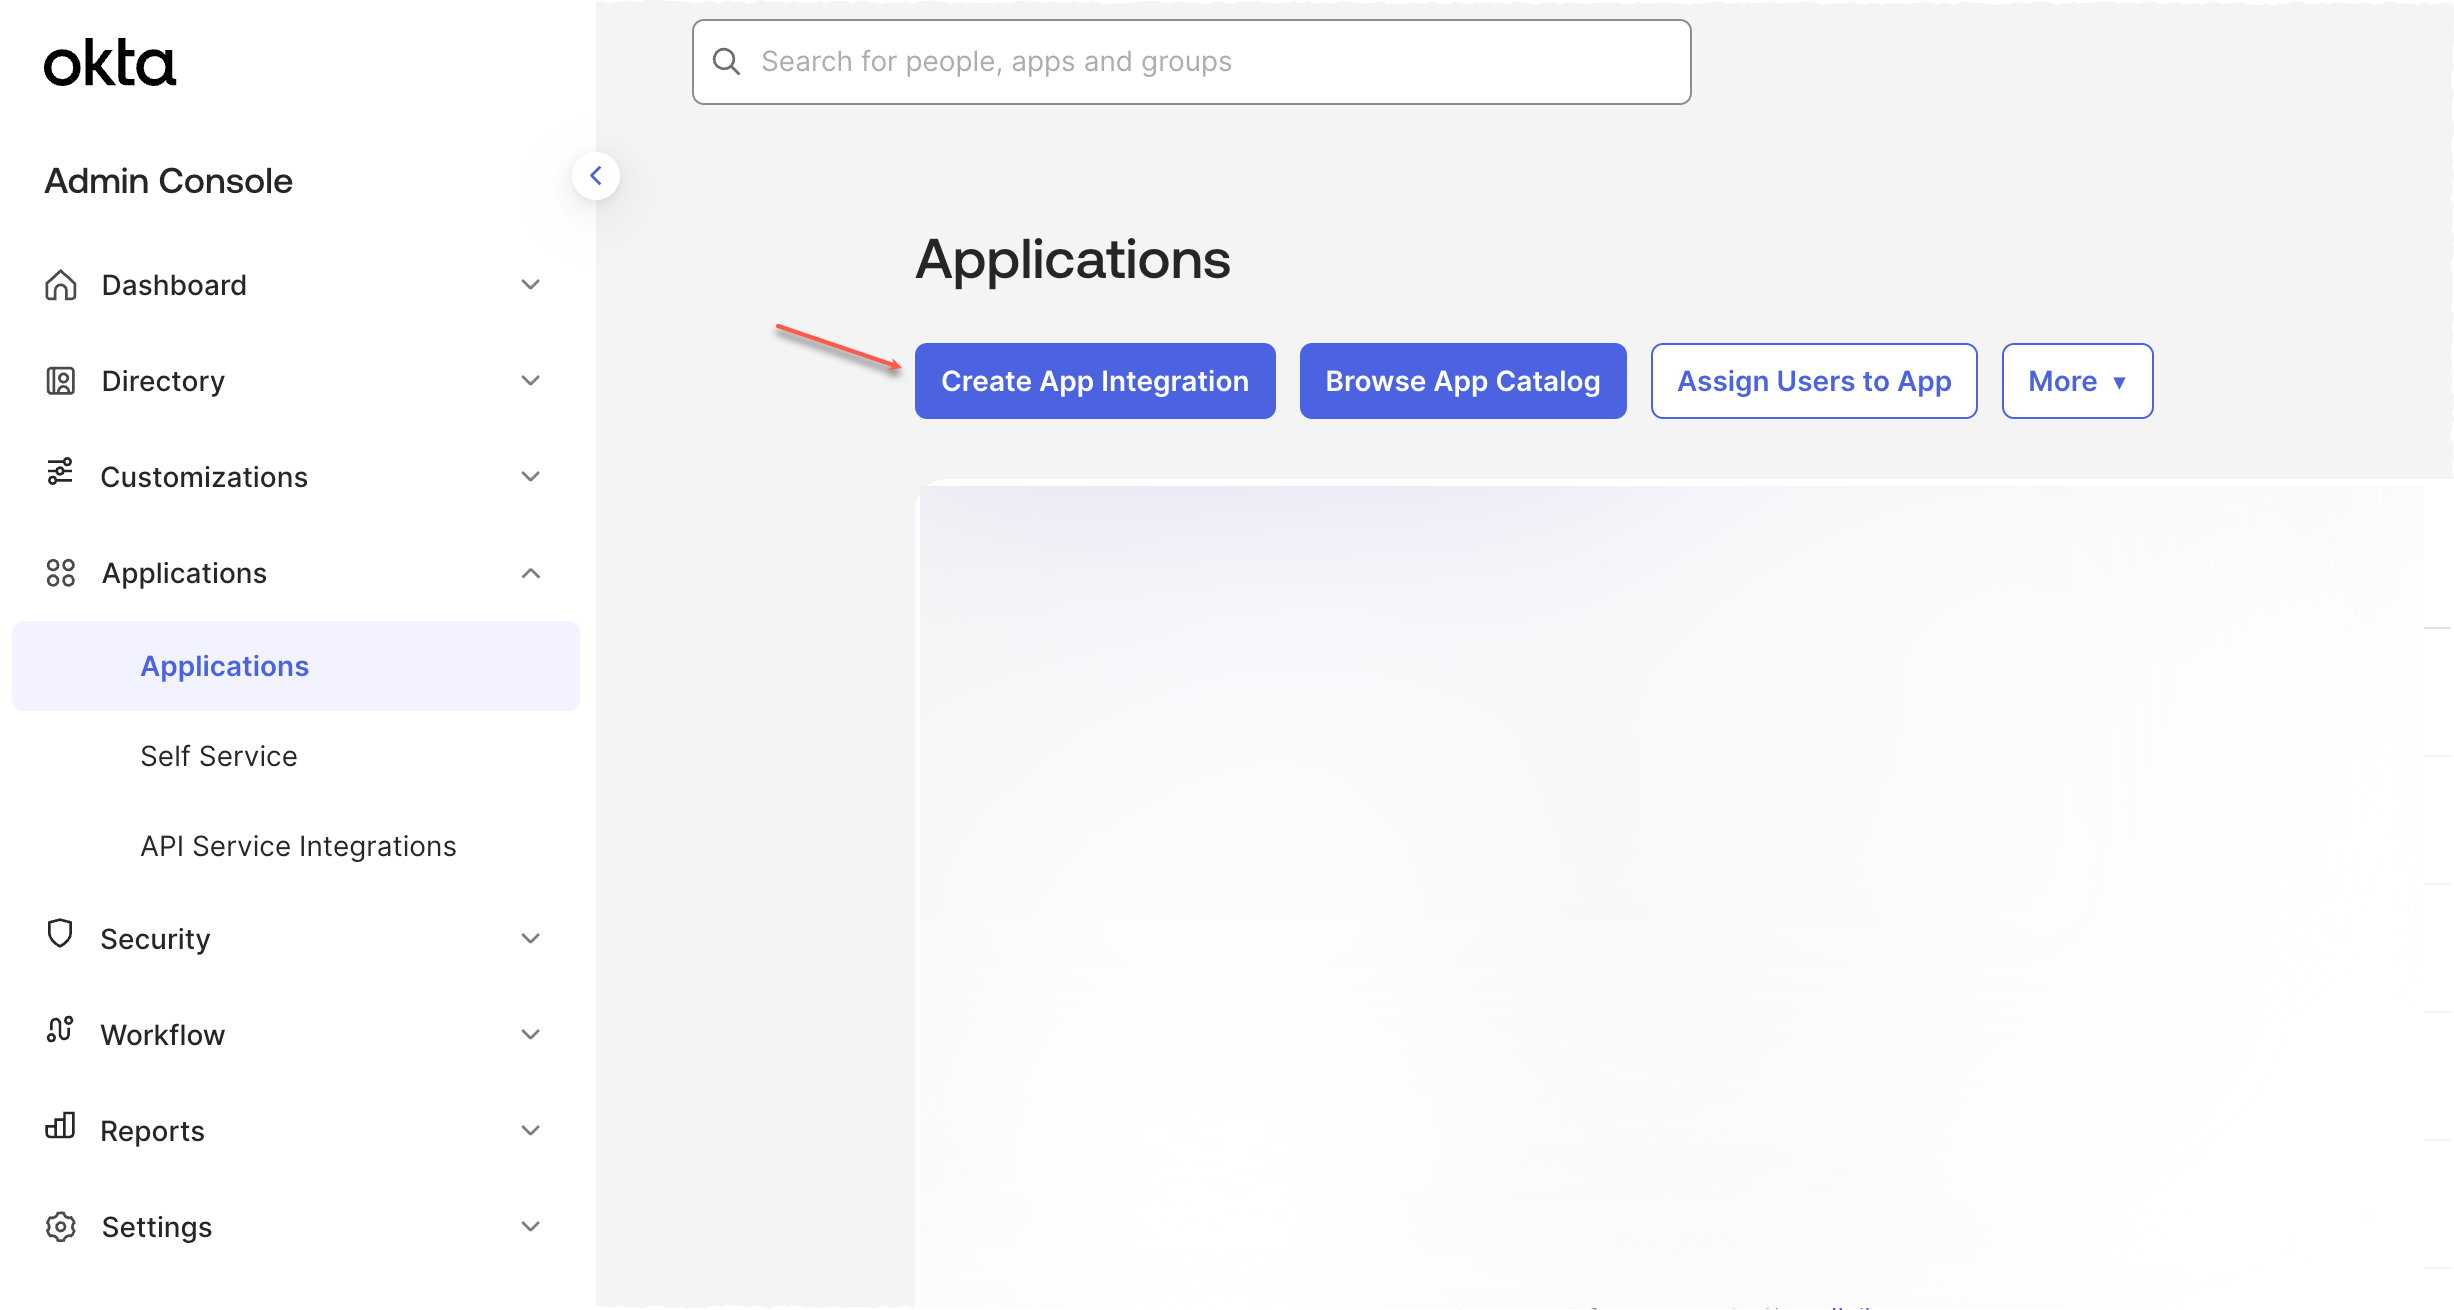
-
Select Create App Integration.
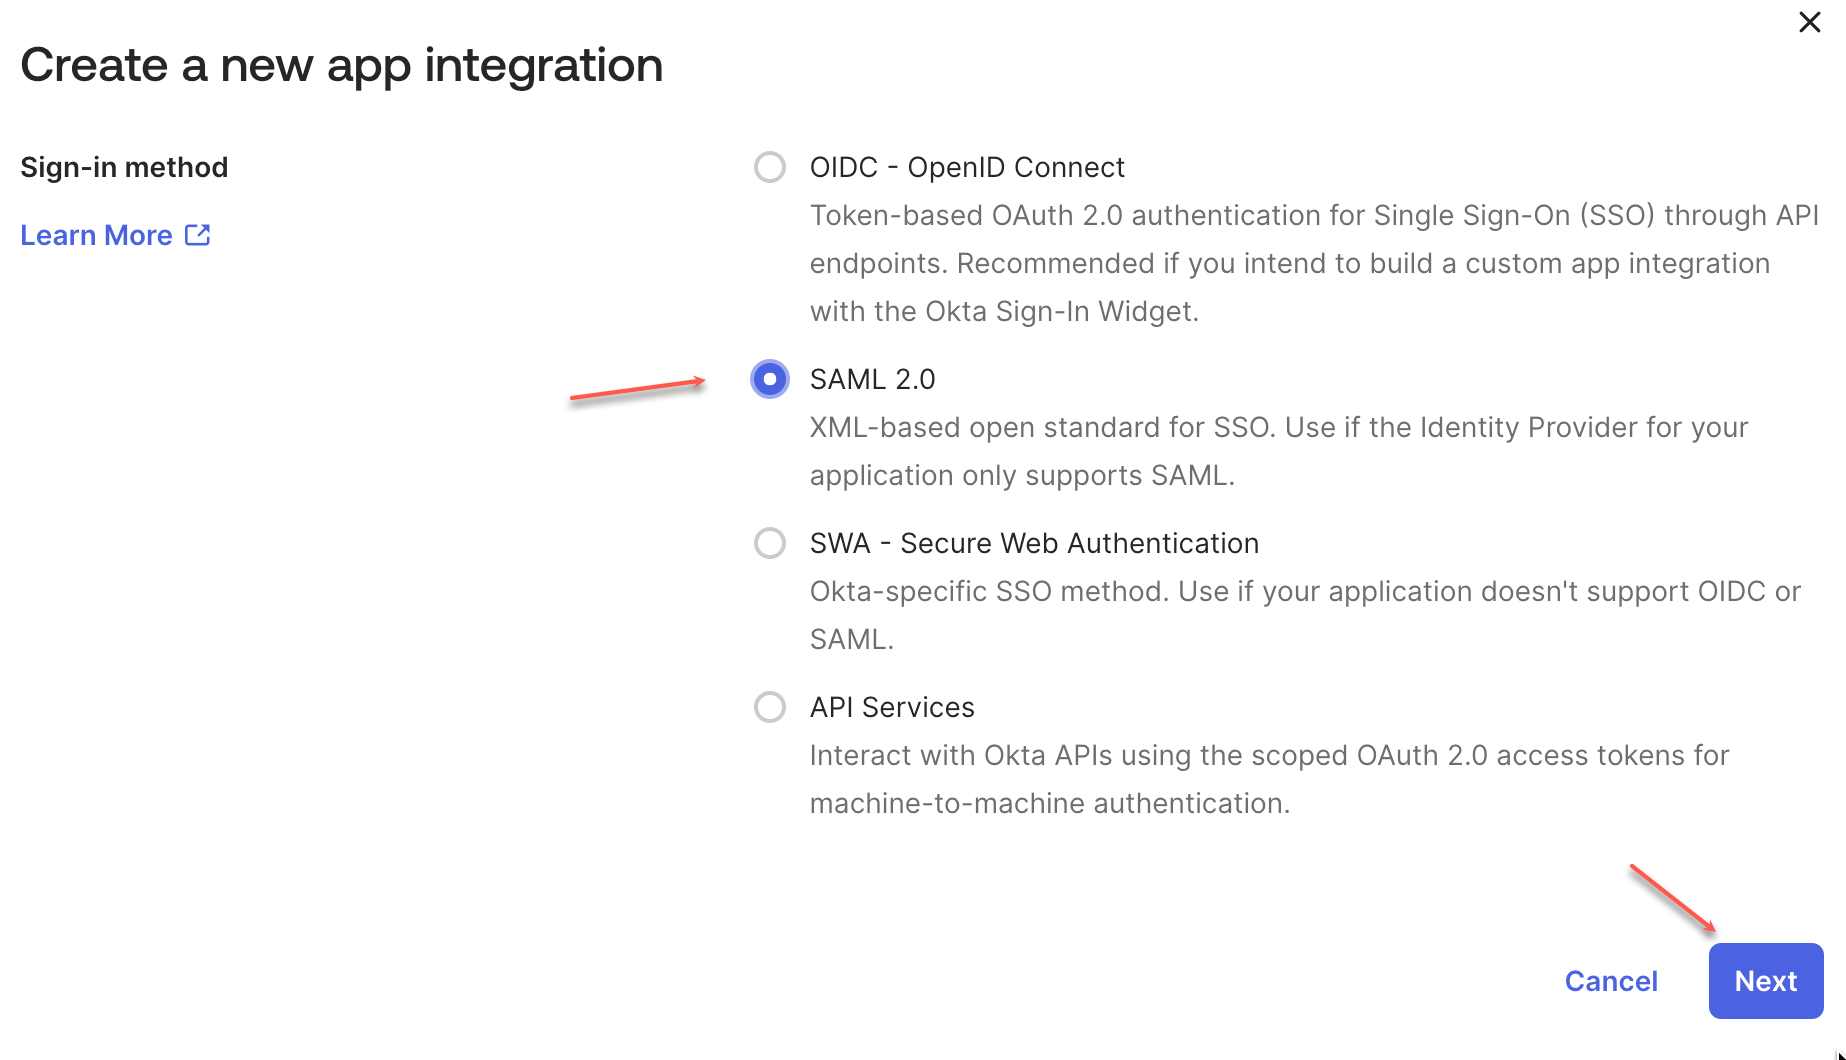
-
Select SAML 2.0 and then select Next.
-
Enter an App name and add an App logo (optional).
Enable the Do not display application icon App Visibility option to hide application tile from users in Okta dashboard; Tamr does not support IdP-initiated login.
Select Next.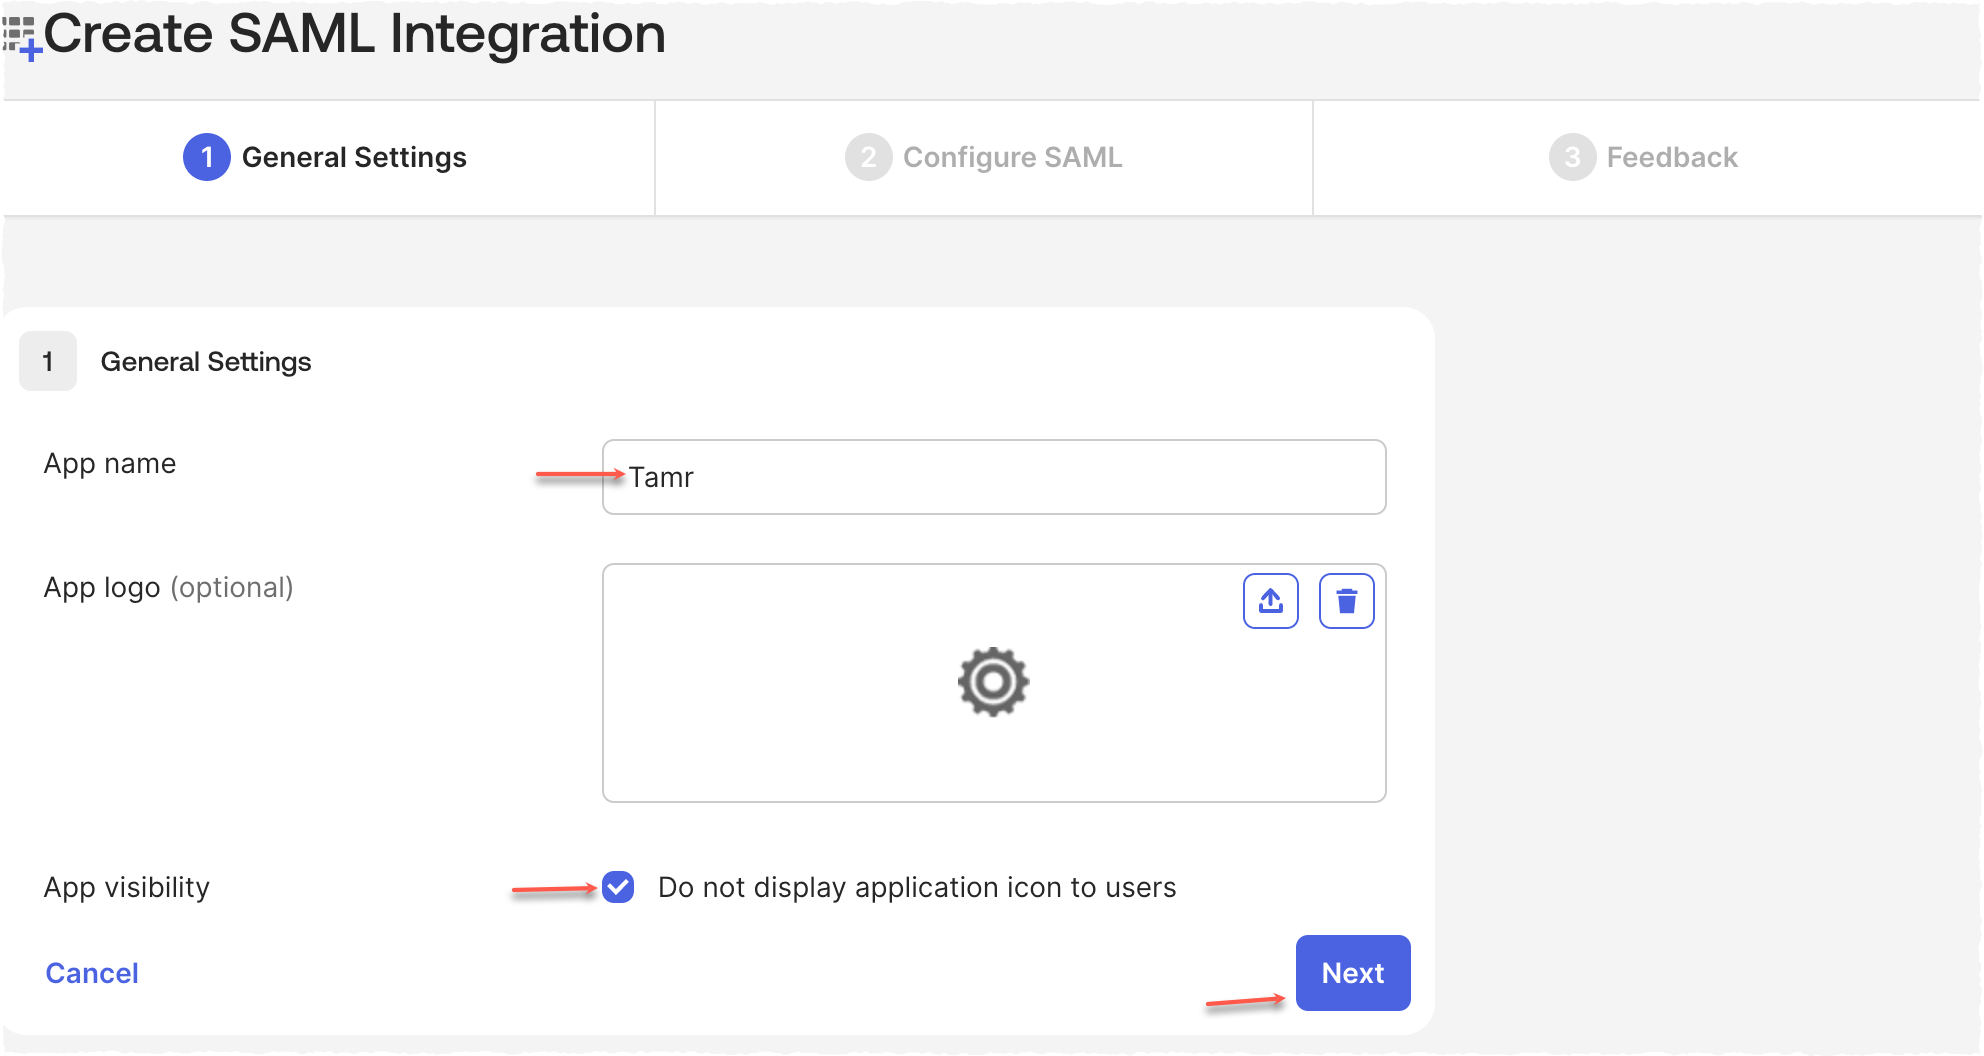
-
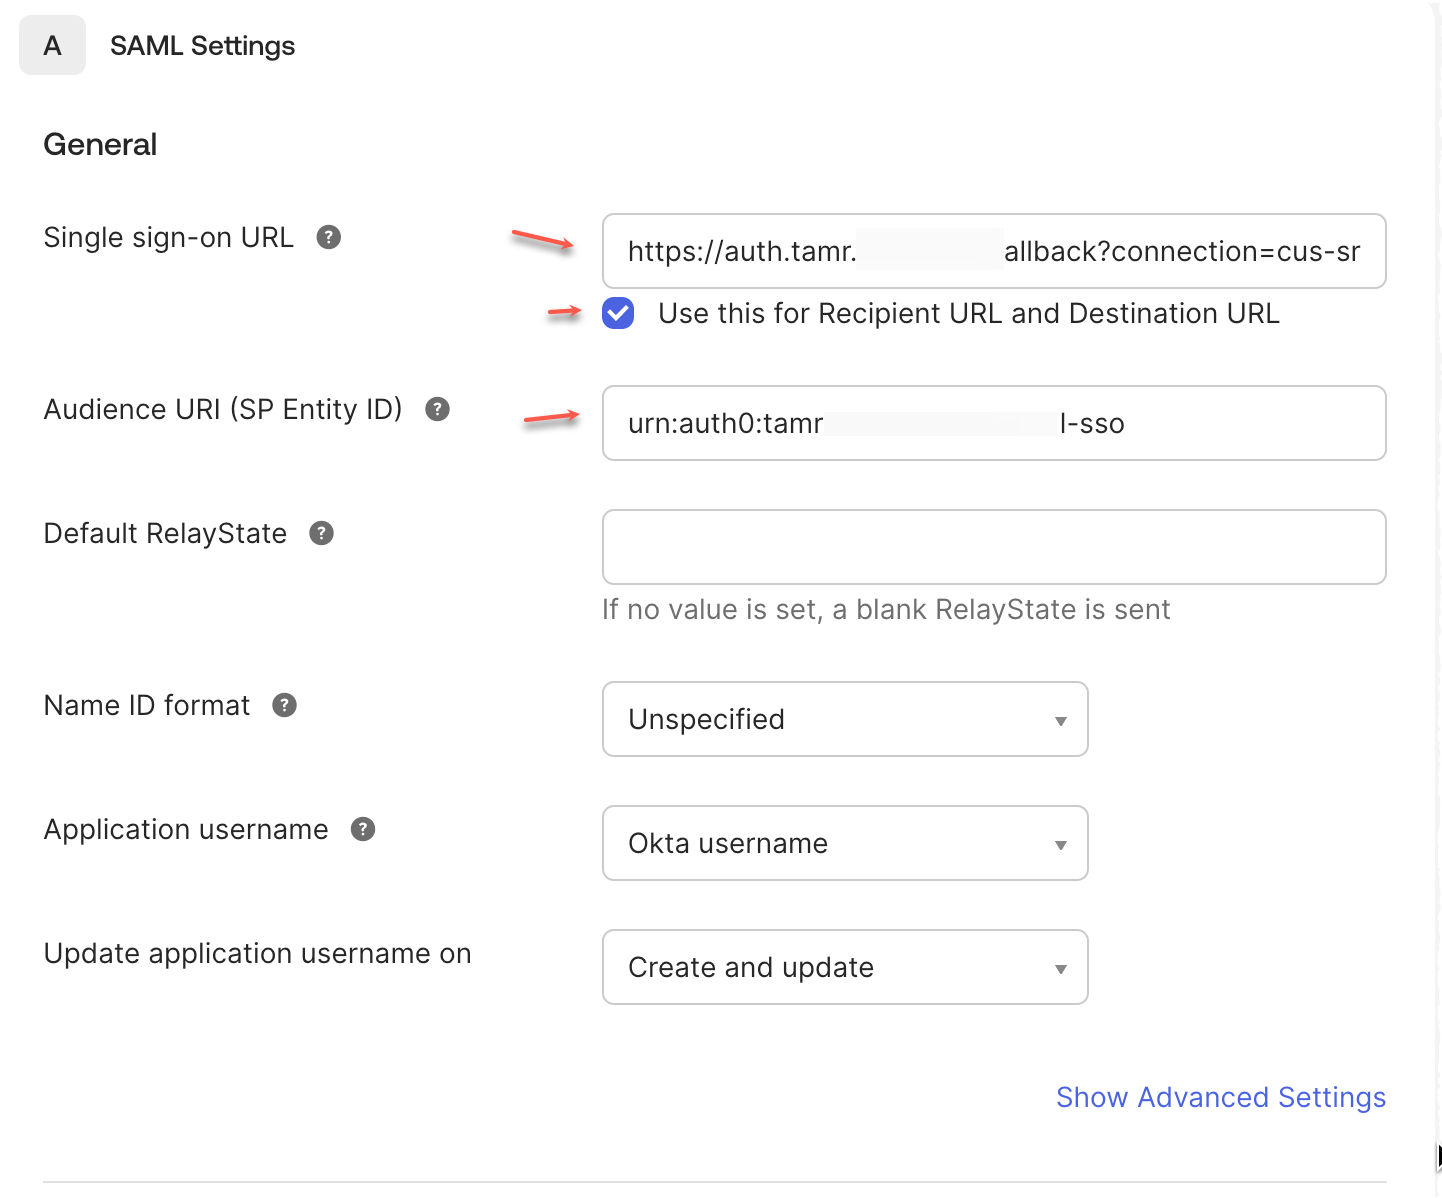
Set the values for Single sign-on URL and Audience URI (SP Entity ID) in SAML Settings.
Enable the Use this for Recipient URL and Destination URL option.
Leave the rest of the settings to their default values.
-
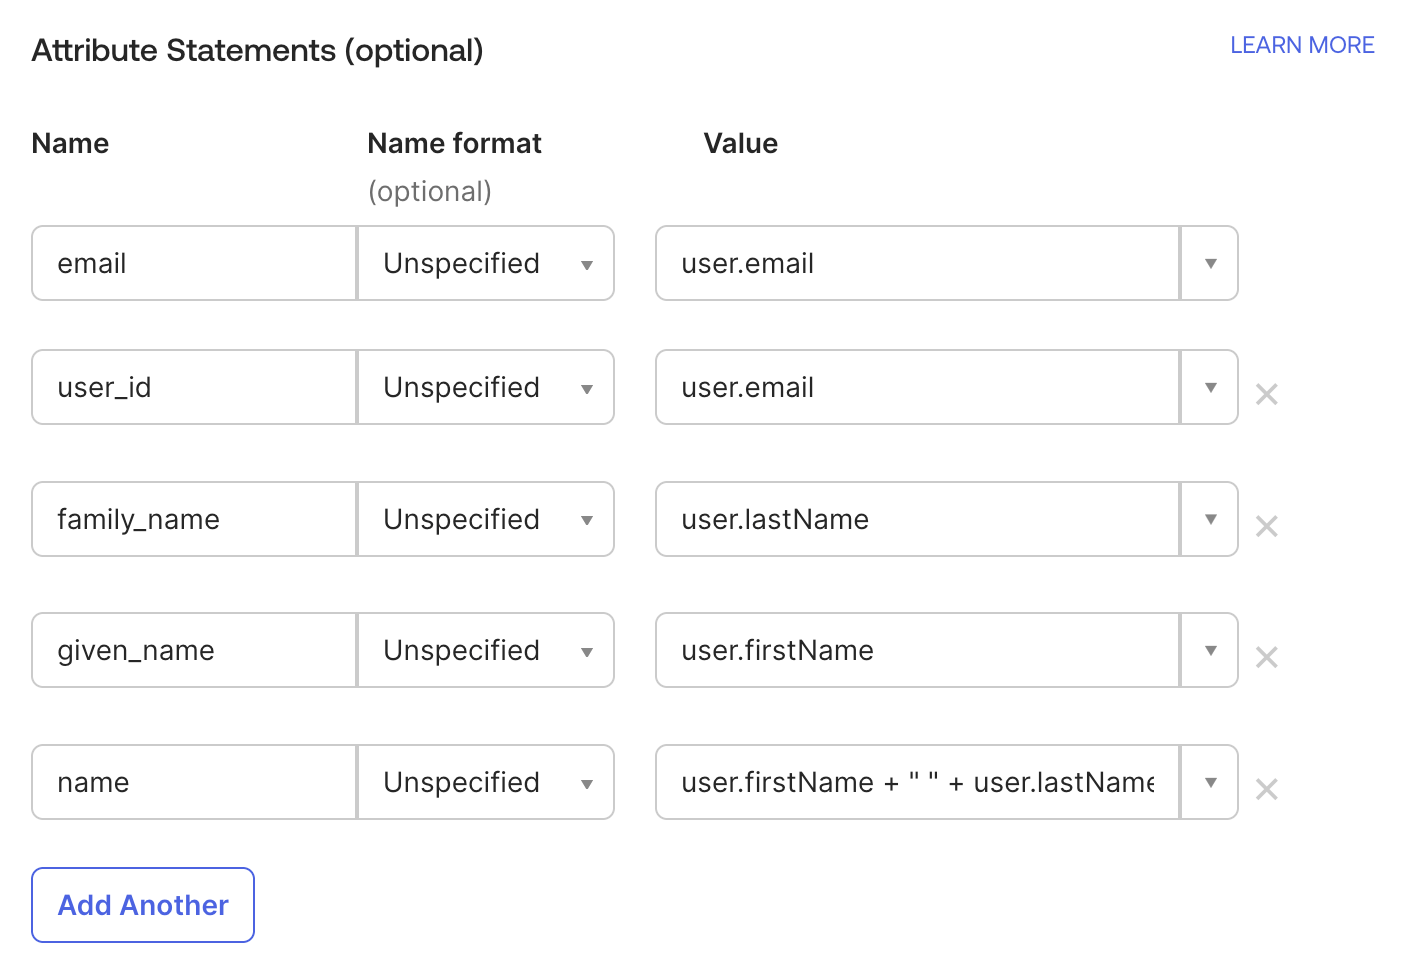
Add the following Attribute Statements.
-
email: user.email
-
user_id: user.email
-
family_name: user.lastName
-
given_name: user.firstName
-
name: user.firstName + " " + user.lastName
-
-
Select Next.
-
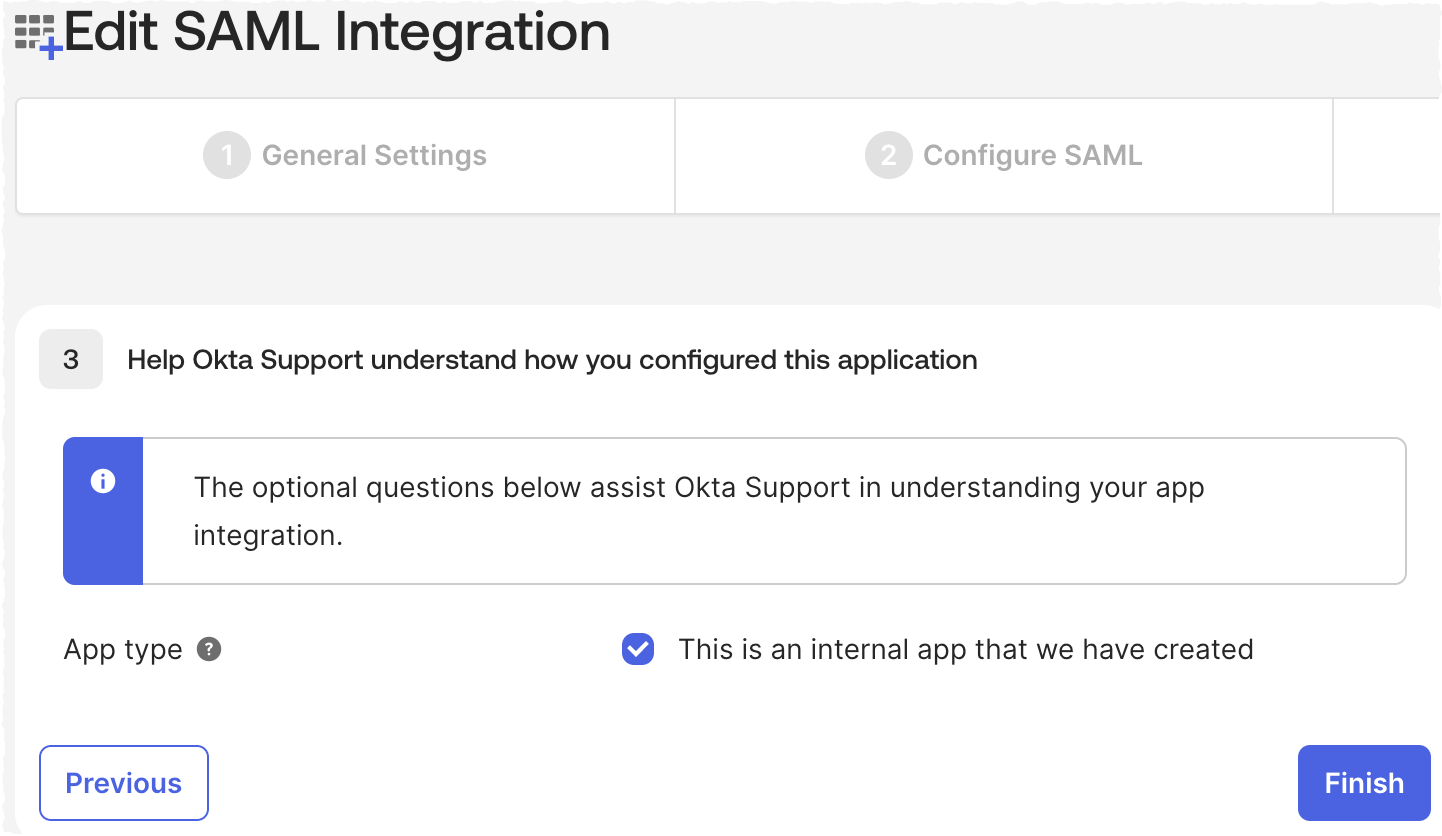
Set the App type to This is an internal app that we have created and select Finish.

-
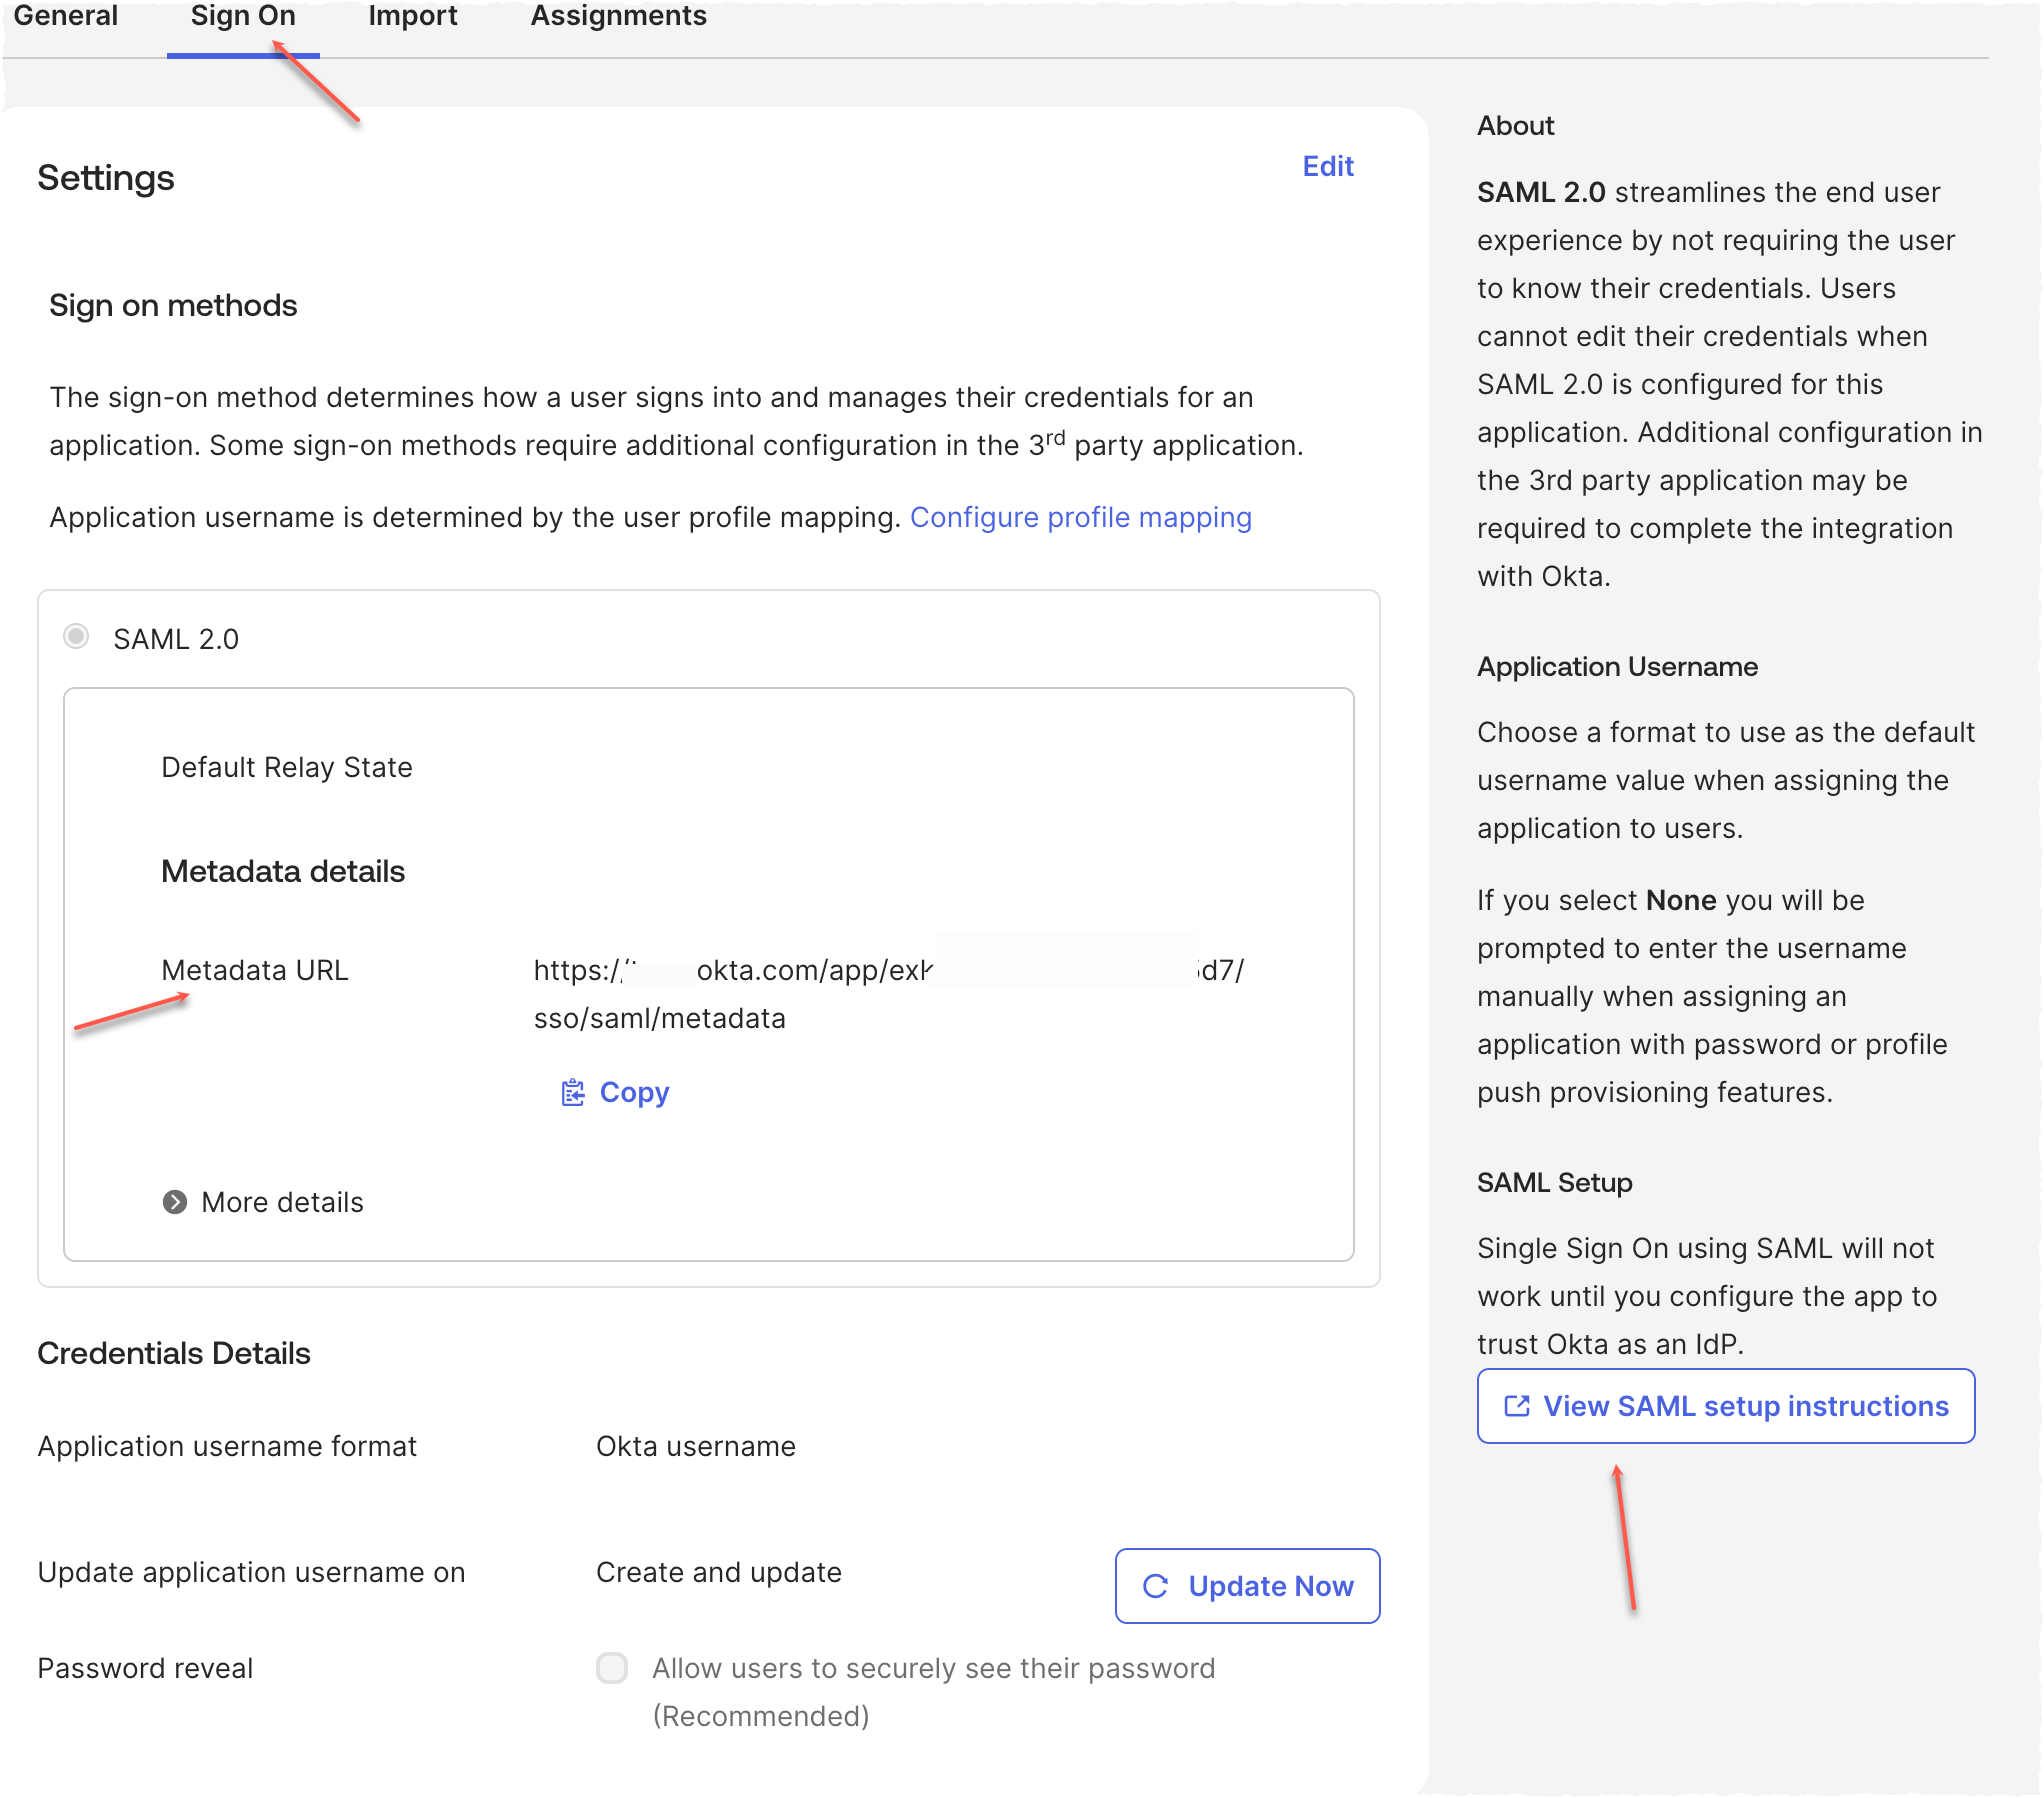
Send either of the following to Tamr Support ([email protected]) to complete the SSO confiugration:
-
Copy the Metadata URL on the Sign On tab and send to Tamr.
-
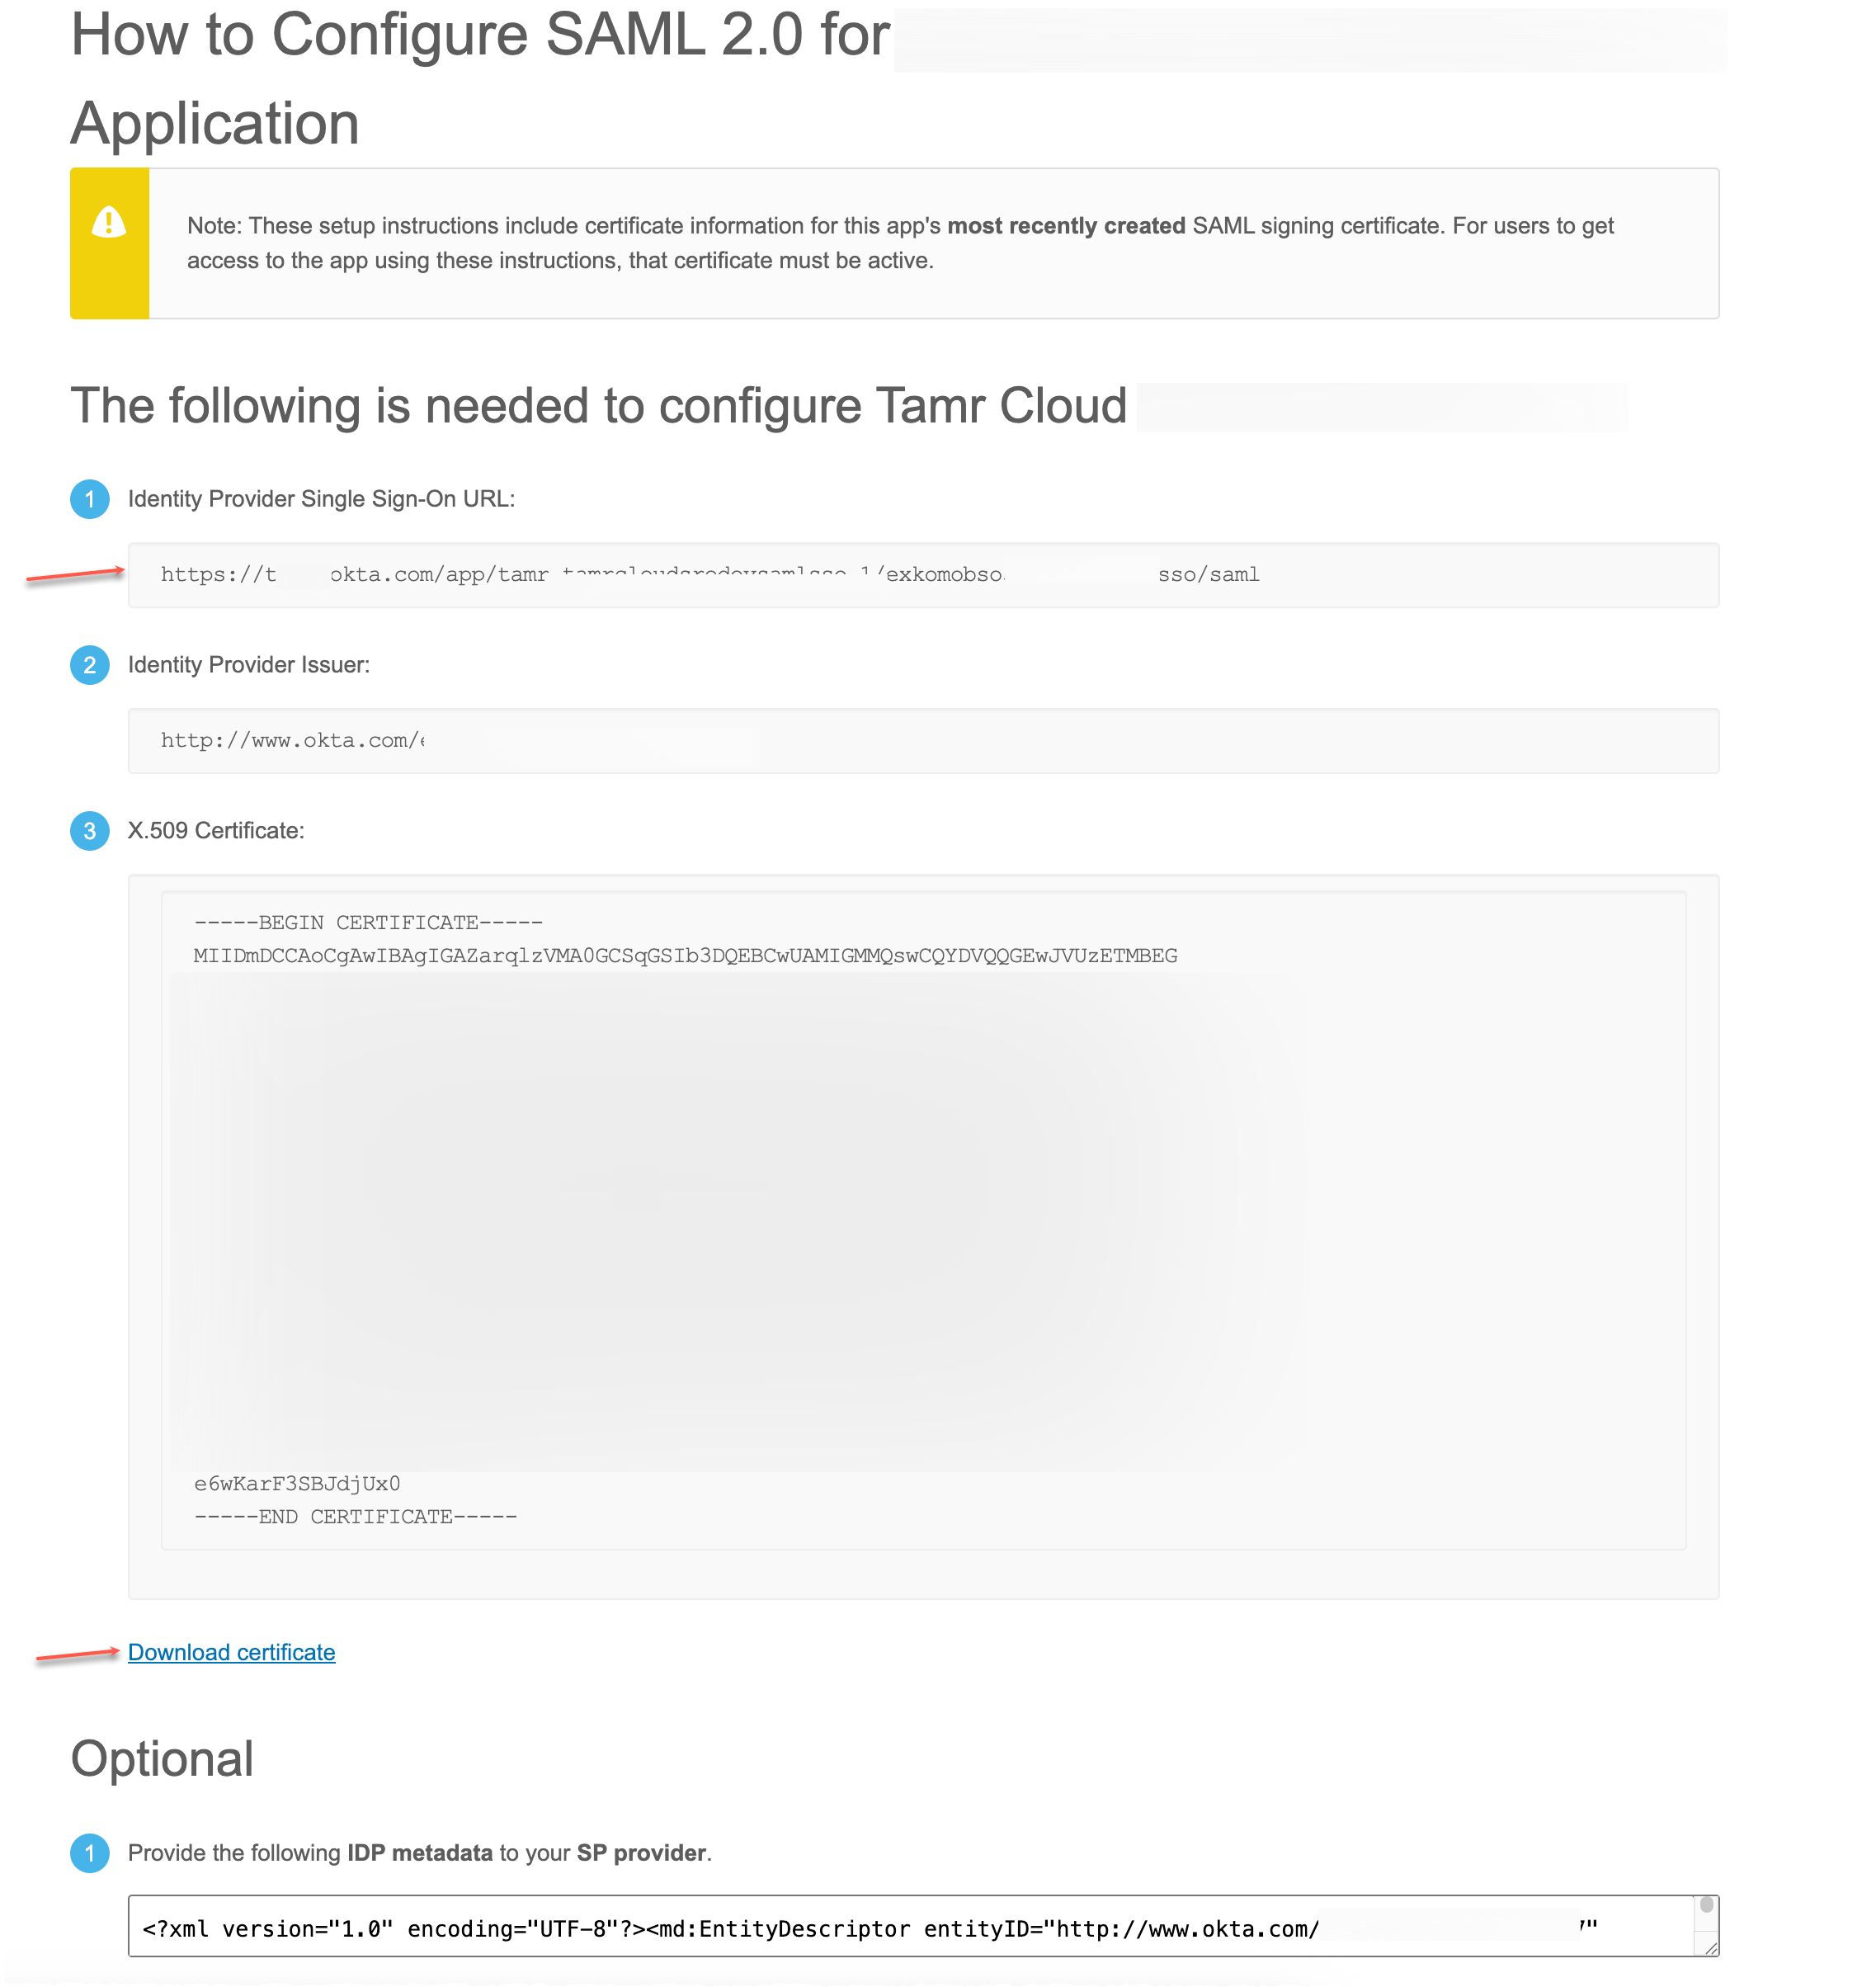
Select View SAML Setup Instructions and send the Identity Provider Single Sign-On URL and X.509 Certificate to Tamr.
-
Updated 7 months ago