
Configuring Single Sign-on with Microsoft Entra ID (Azure Active Directory)
Before configuring SSO with Microsoft Entra ID, contact Tamr Support ([email protected]) for the following information:
- Identifier (Entity ID). (This value is the audience restriction provided by Tamr, and begins with the string
urn:auth0:.) - Reply URL (Assertion Consumer Service URL)
- Sign on URL. Note that this value is the same as the Reply URL.
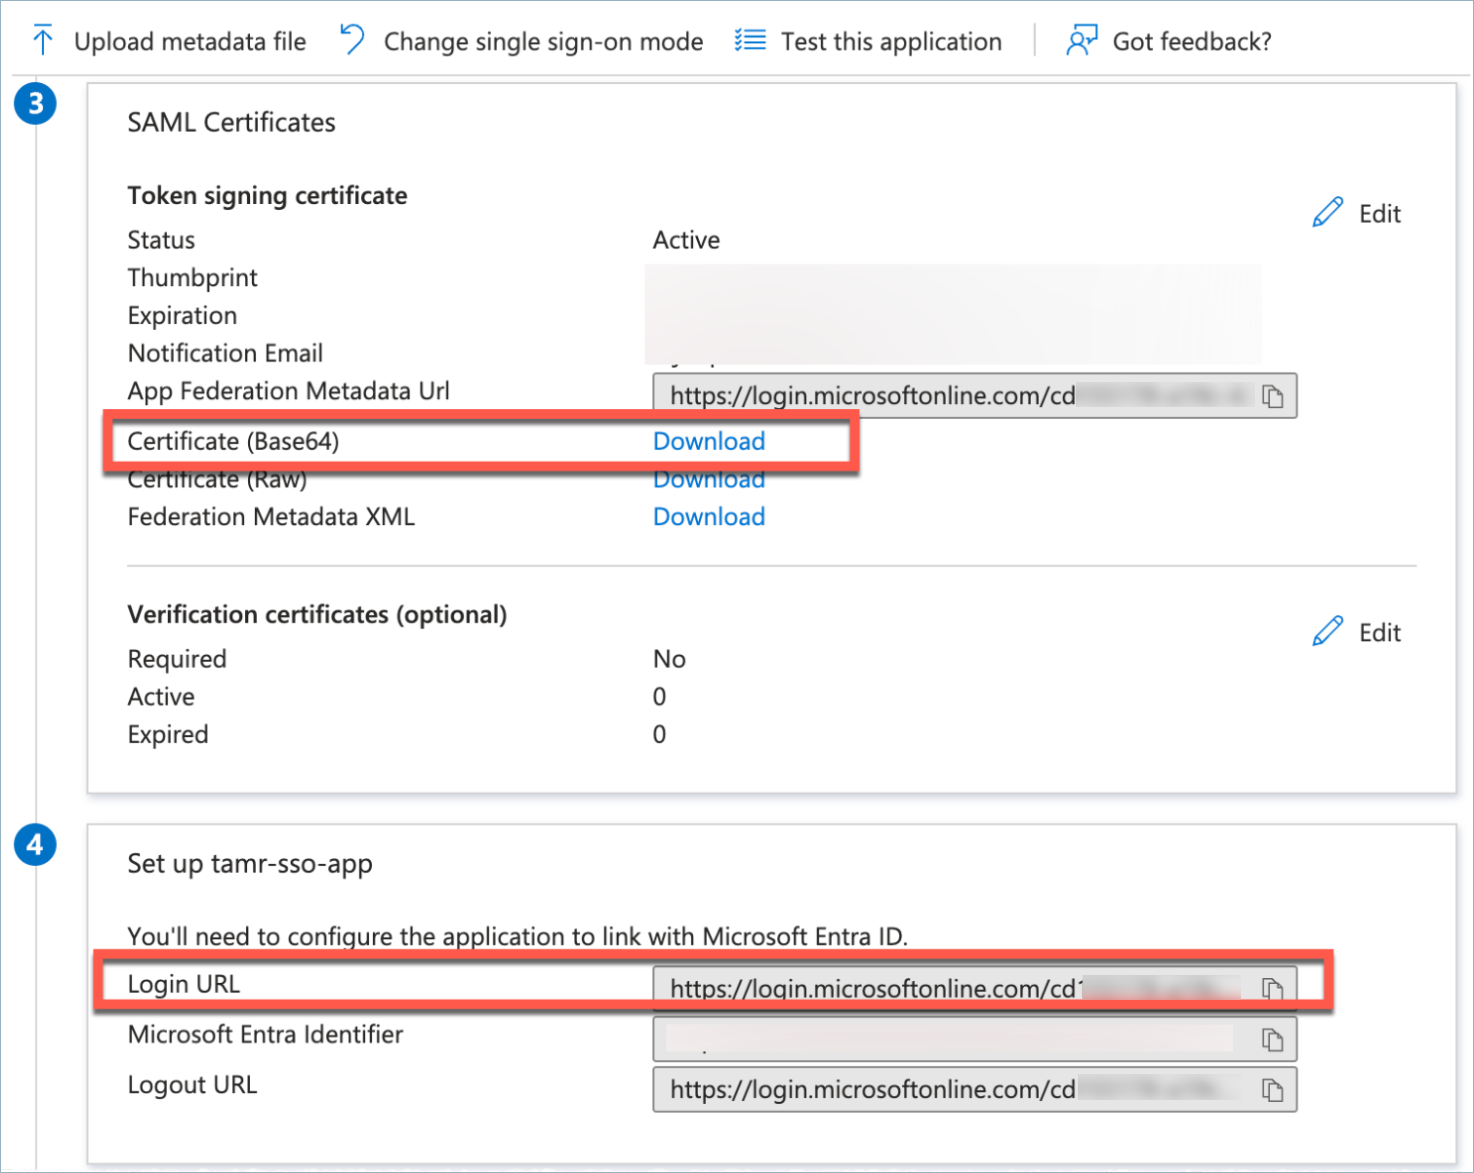
After configuring SSO with Microsoft Entra ID, send the following information to Tamr Support:
- Certificate (Base64)
- Login URL
To configure SSO with Microsoft Entra ID:
-
Sign into your Azure admin portal
-
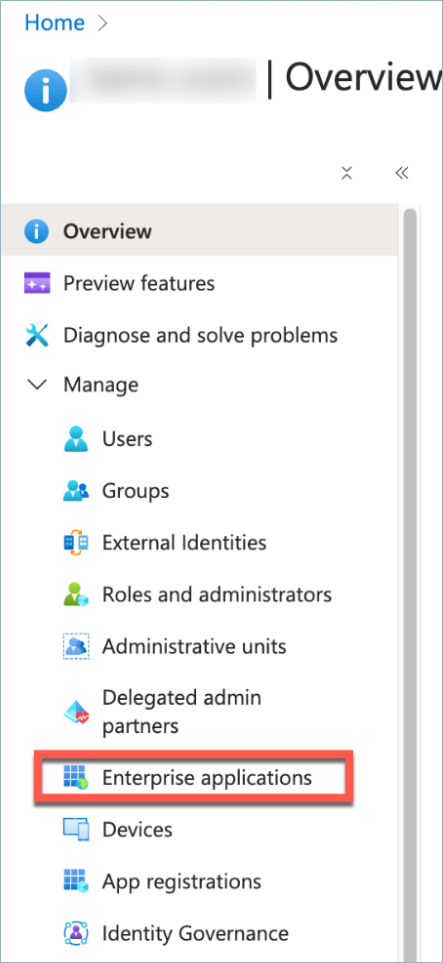
In the left menu, select Microsoft Entra ID.
-
Navigate to Manage > Enterprise applications.
-
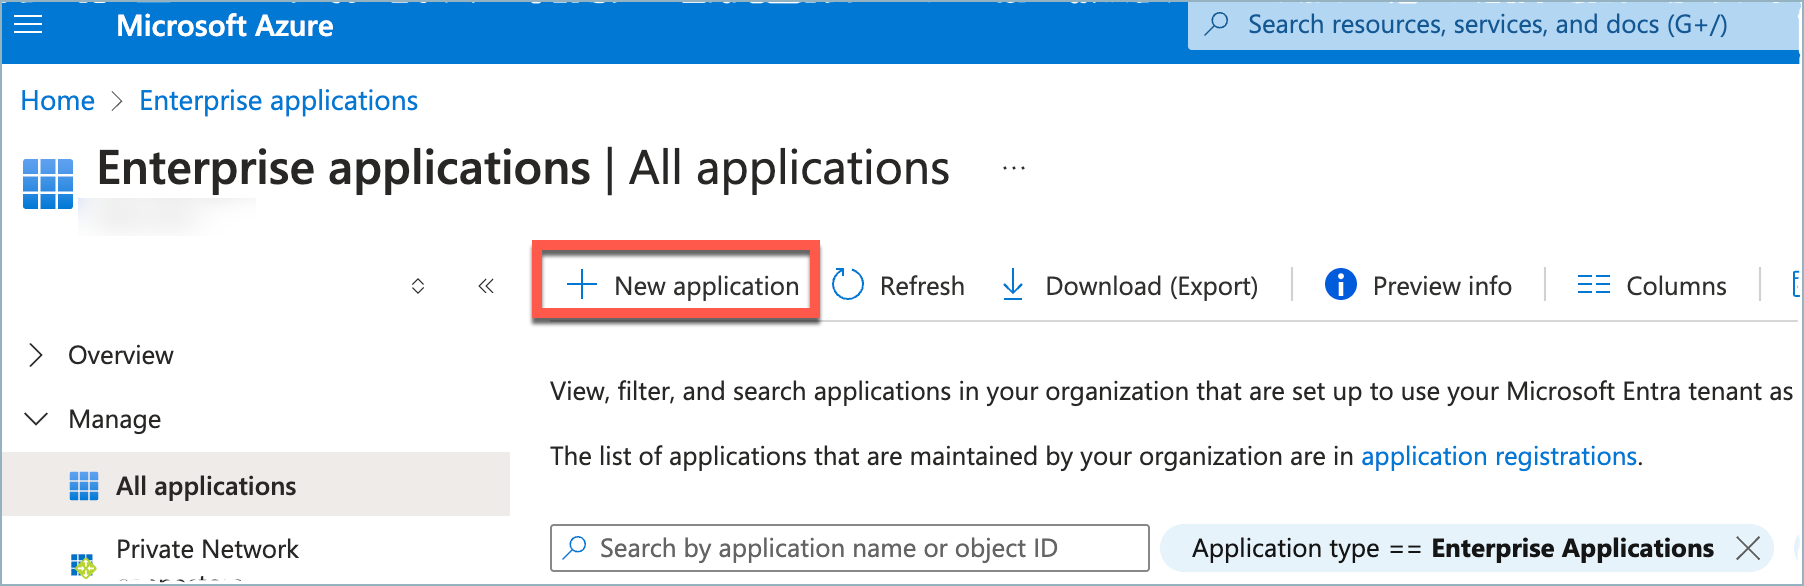
In the Enterprise applications page, select New application .
-
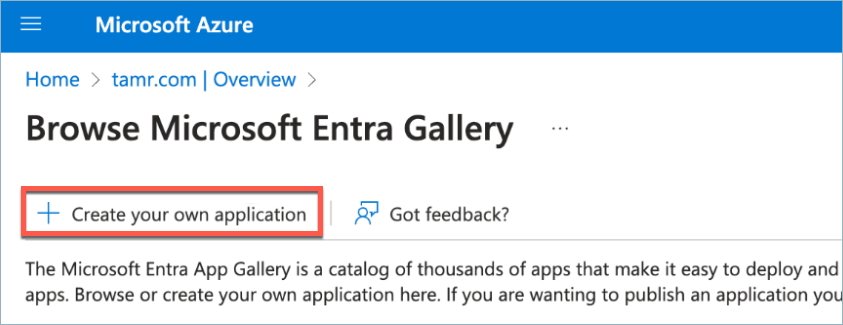
Select Create your own application .
-
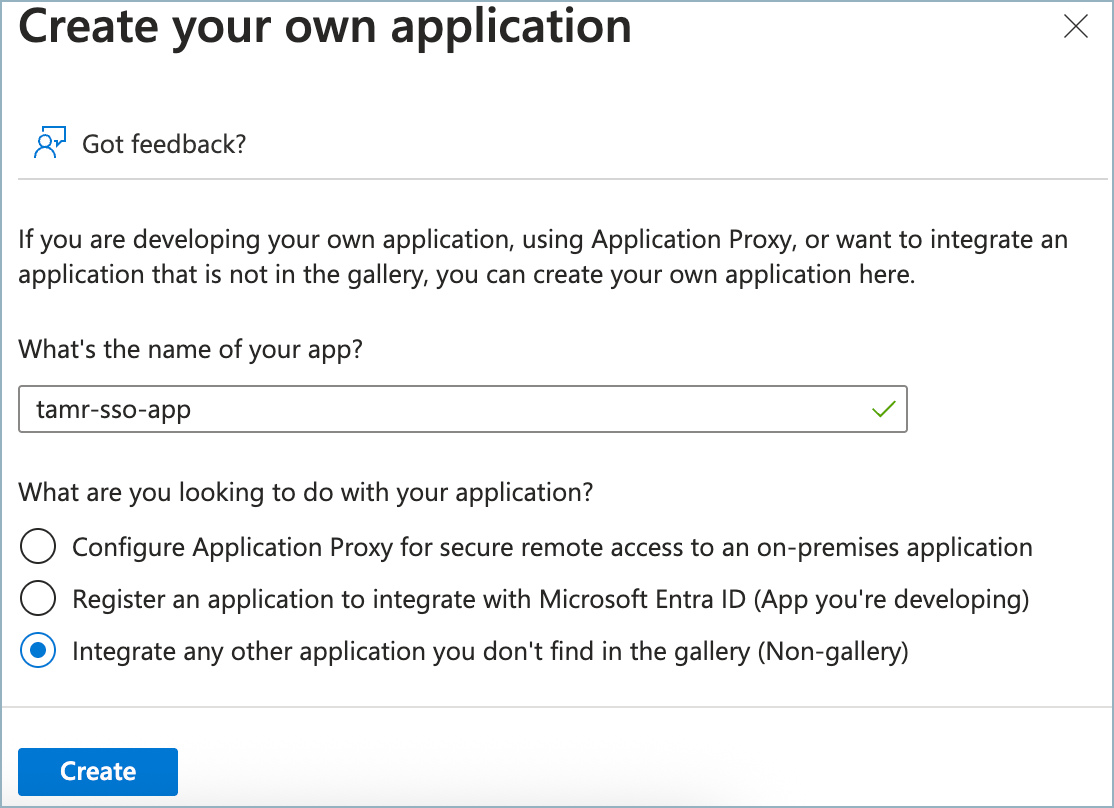
Configure the Create your own application settings as follows:
-
Enter a name for the application. For example: tamr-sso-app
-
Select Integrate any other application you don't find in the gallery (Non-gallery)
-
Select Create .
-
-
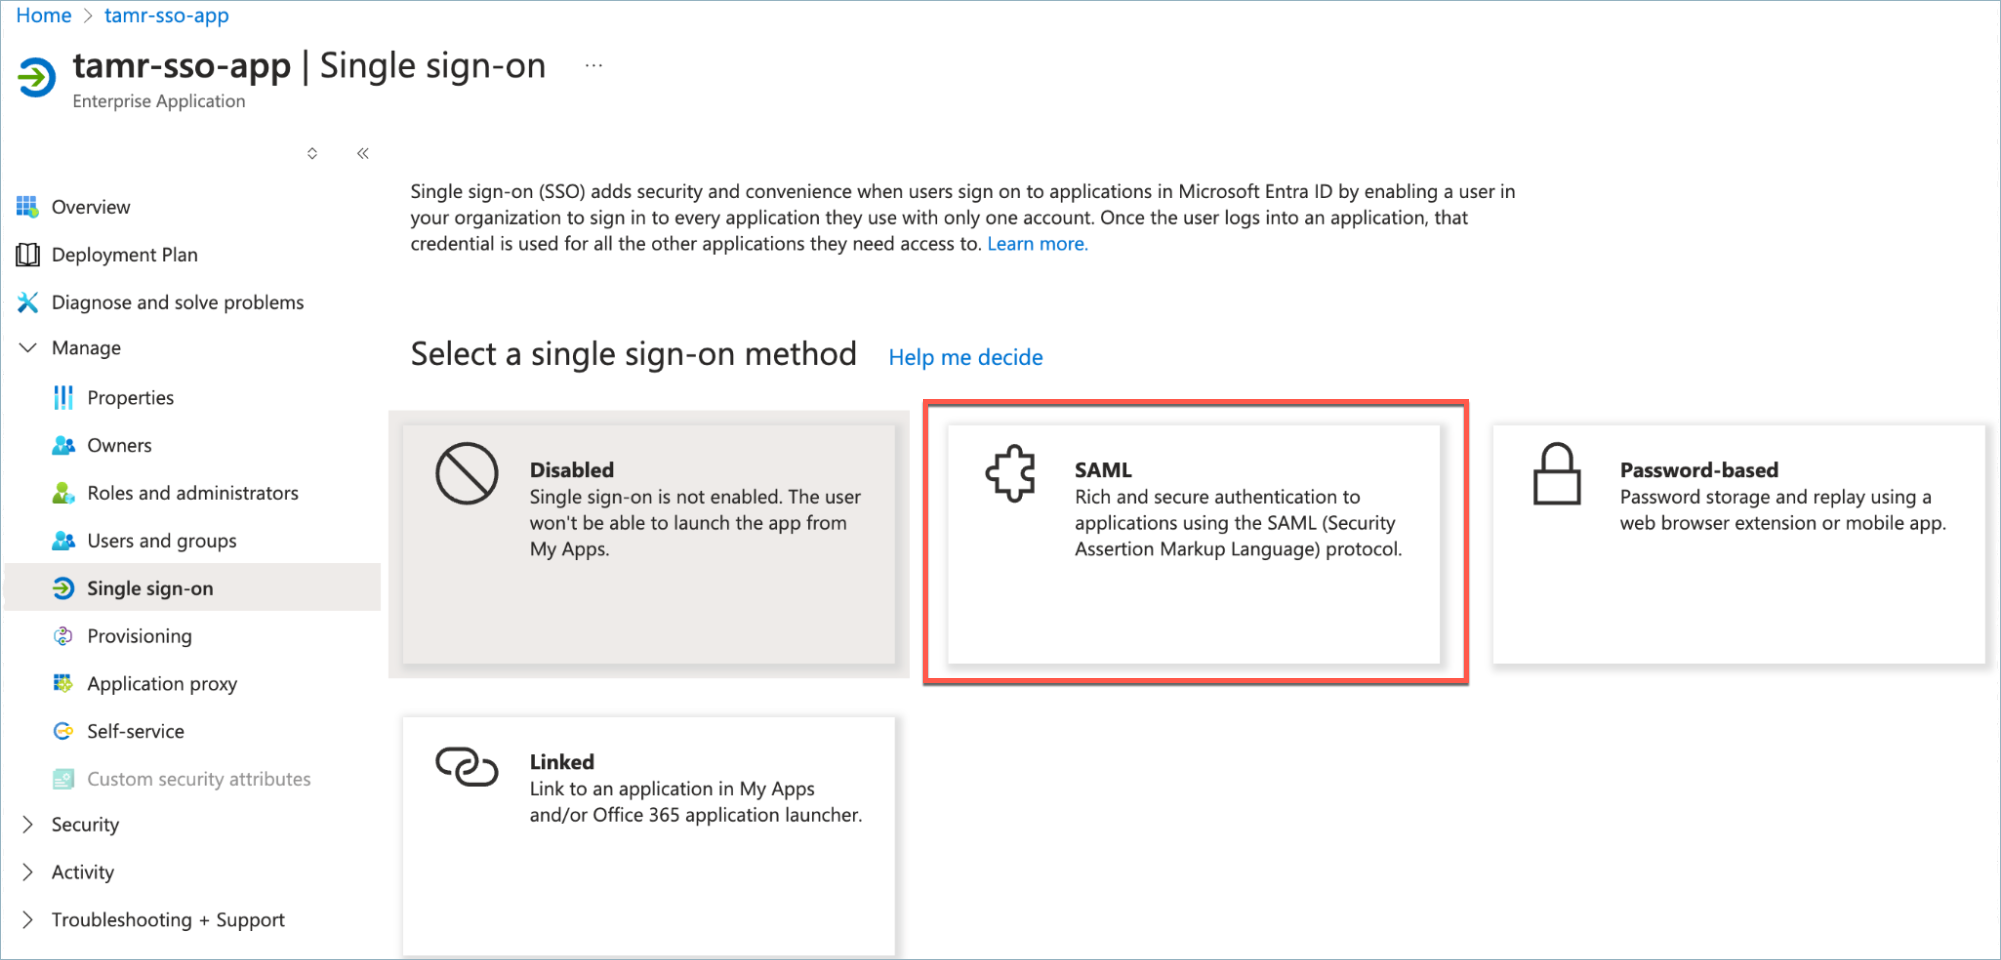
In the newly created application page, navigate to Manage > Single sign-on.
-
Select SAML in the Select a single sign-on method.
-
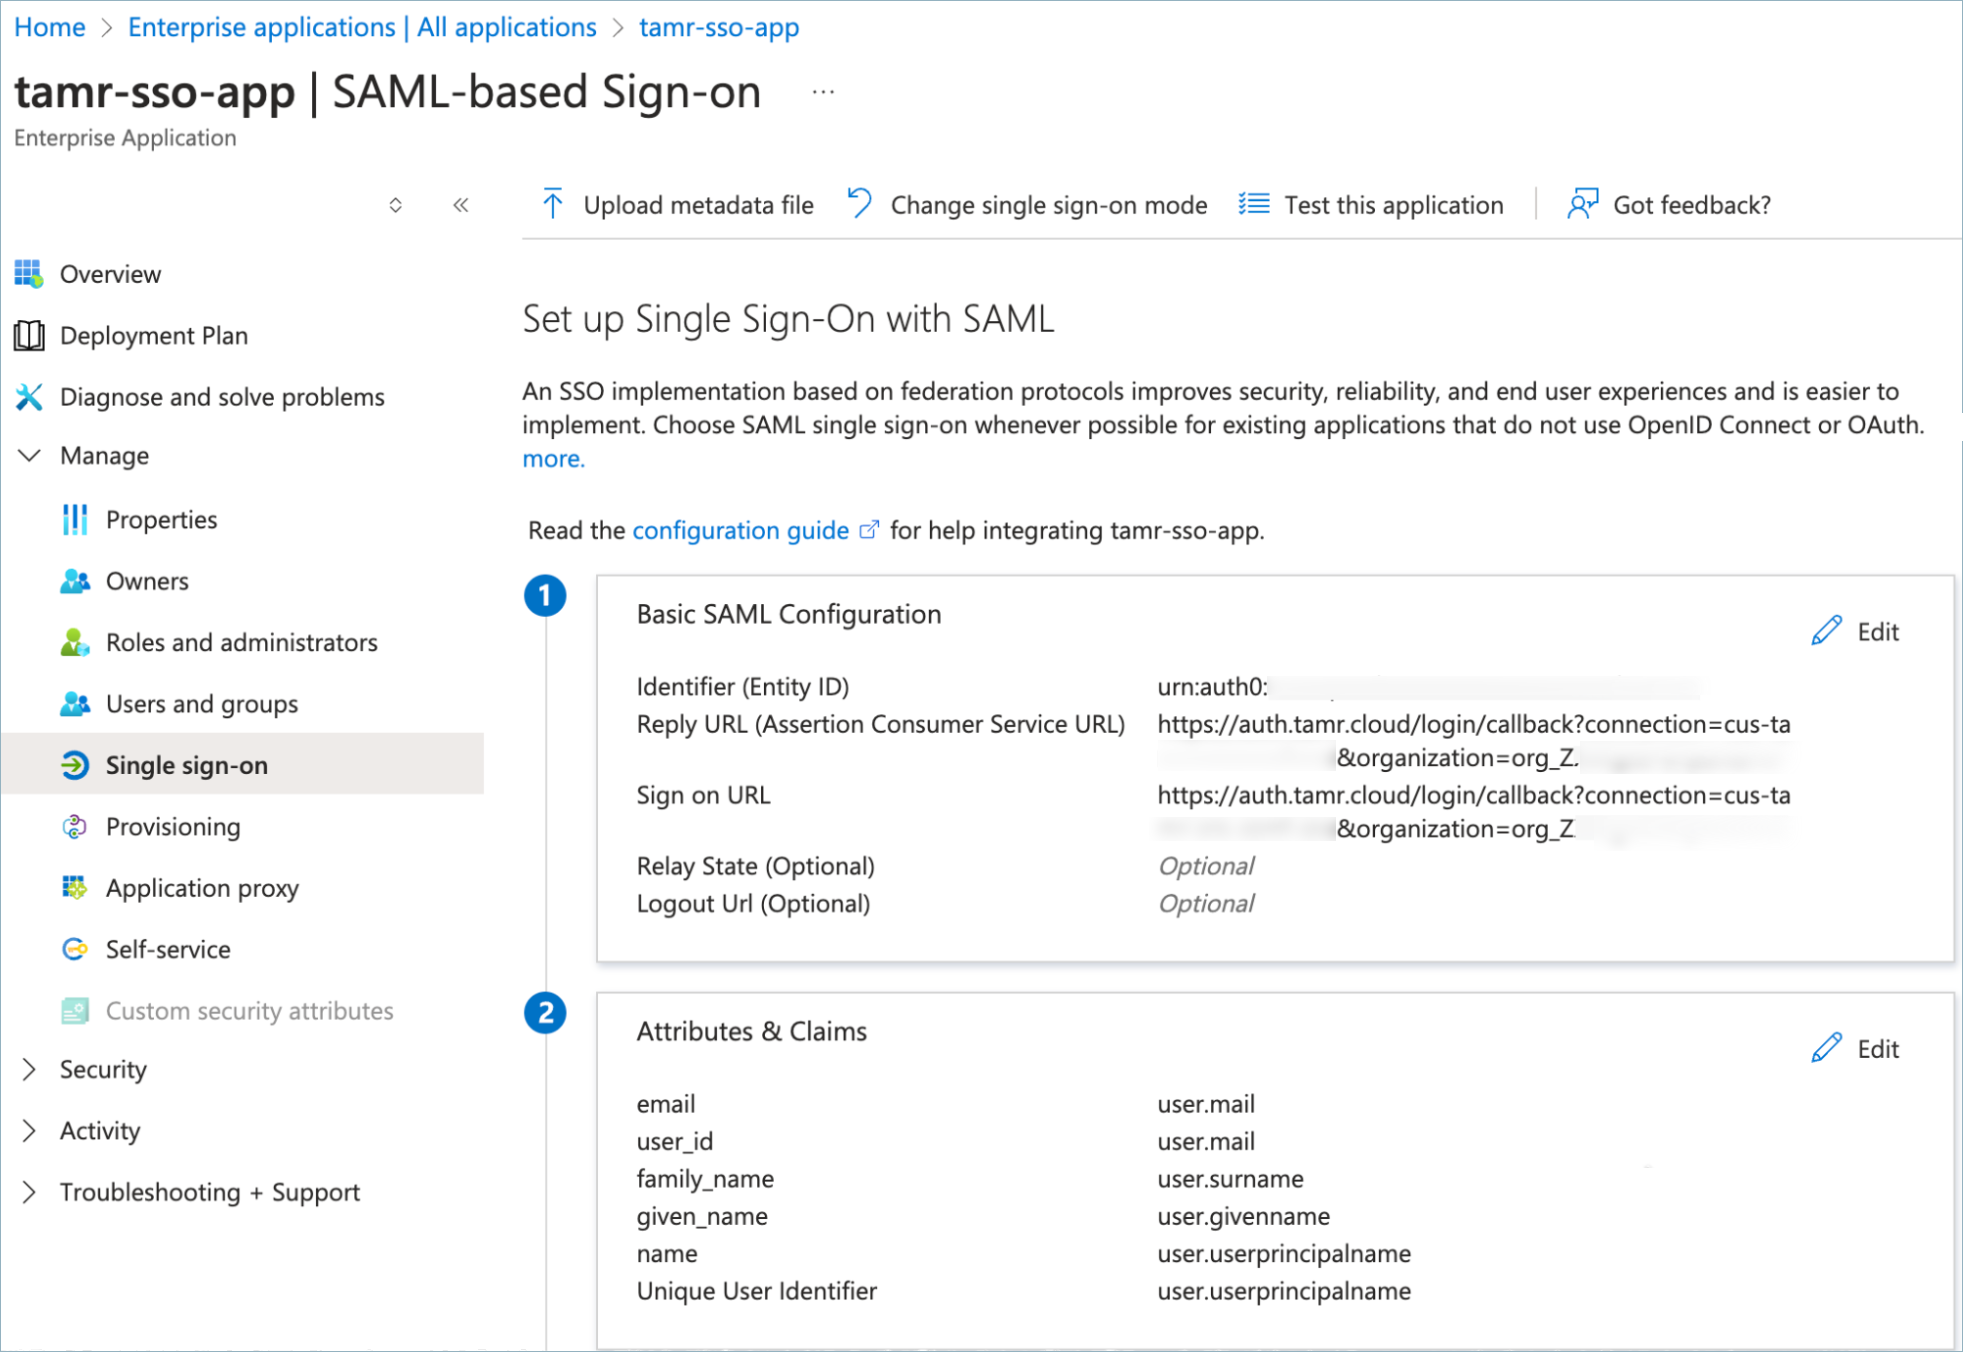
In the Set up Single Sign-On with SAML page, select the Edit icon in the Basic SAML configuration section.
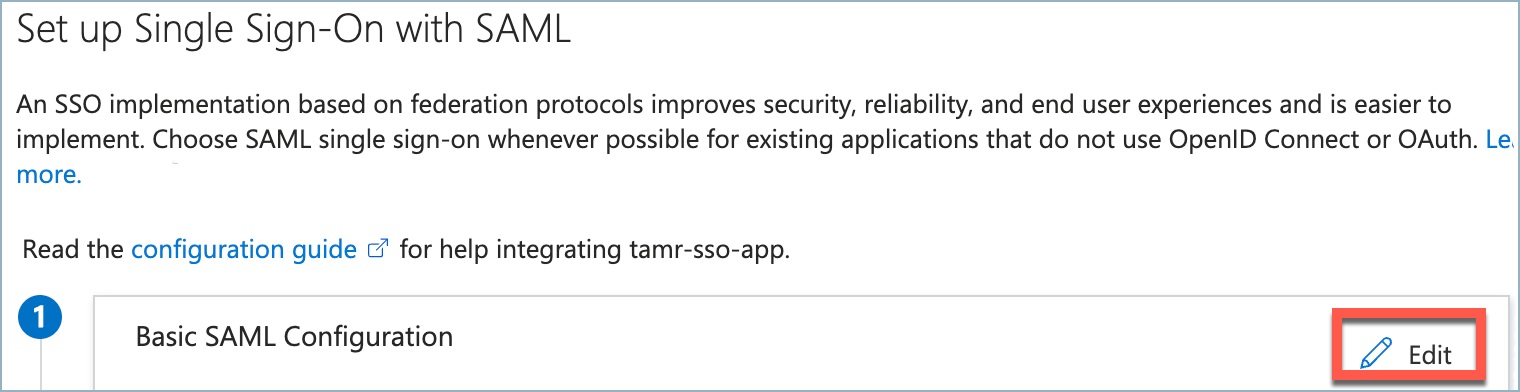
-
Configure the following:
- Enter the Identifier (Entity ID) value provided by Tamr. This value is the audience restriction provided by Tamr and begins with the string urn:auth0:
- Enter the Reply URL (Assertion Consumer Service URL) and Sign on URL values provided by Tamr. The URLs for these settings are the same.
-
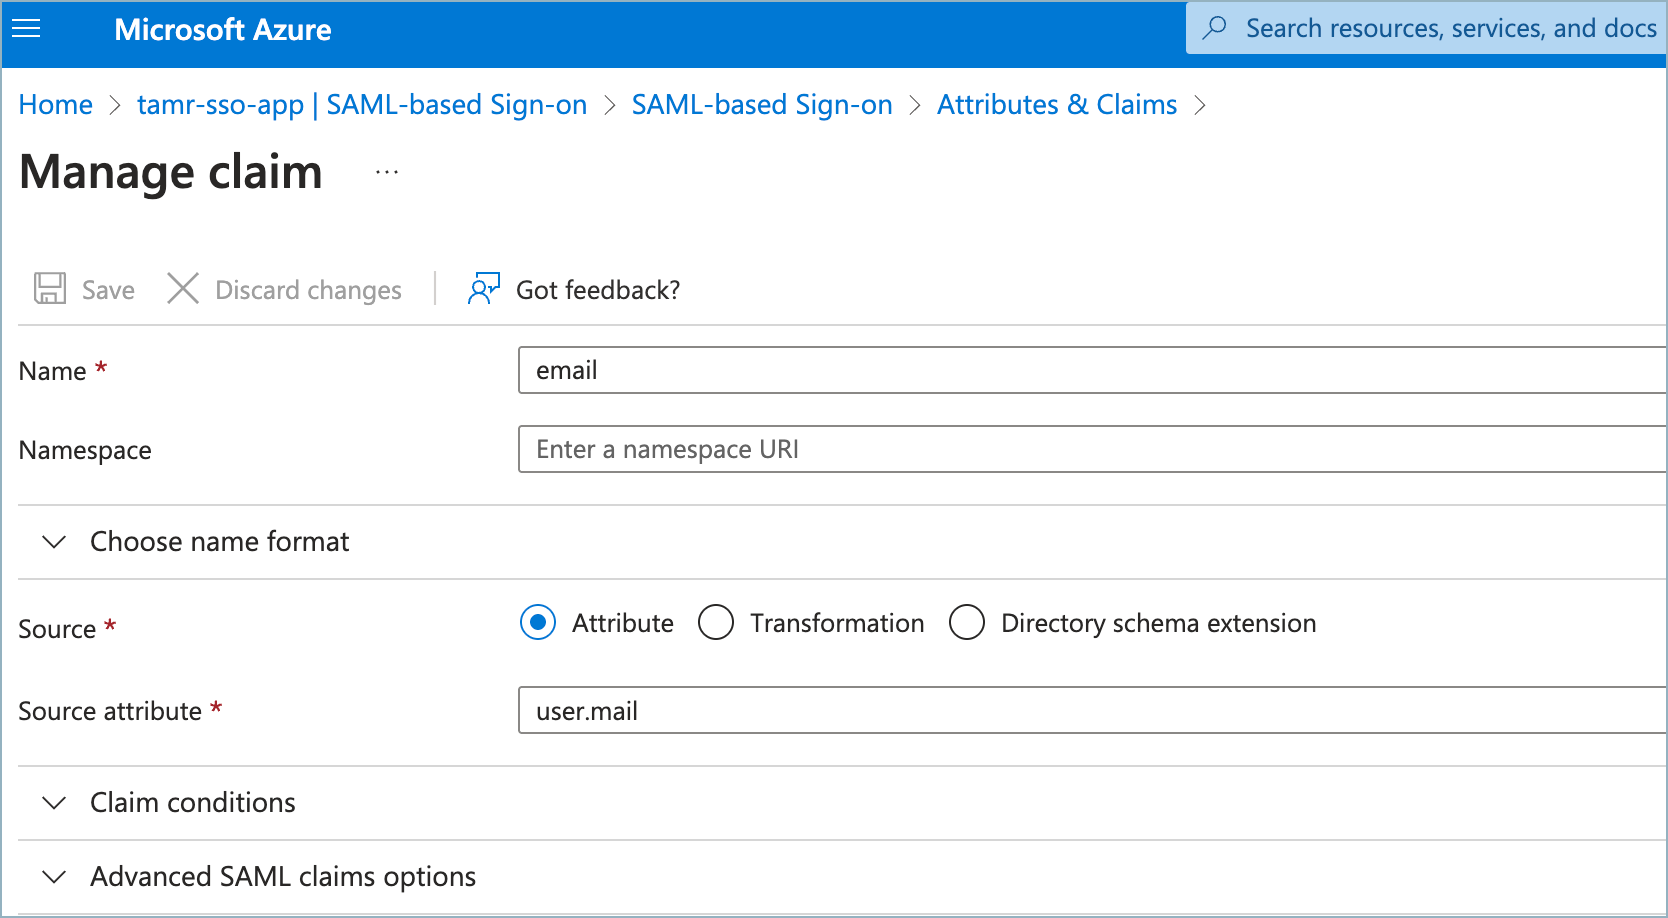
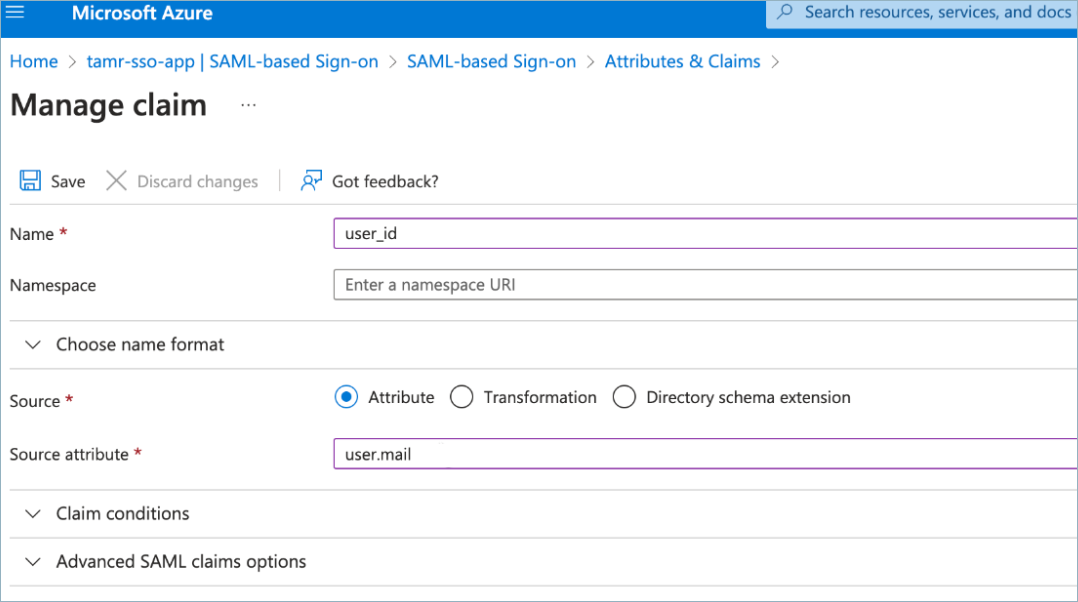
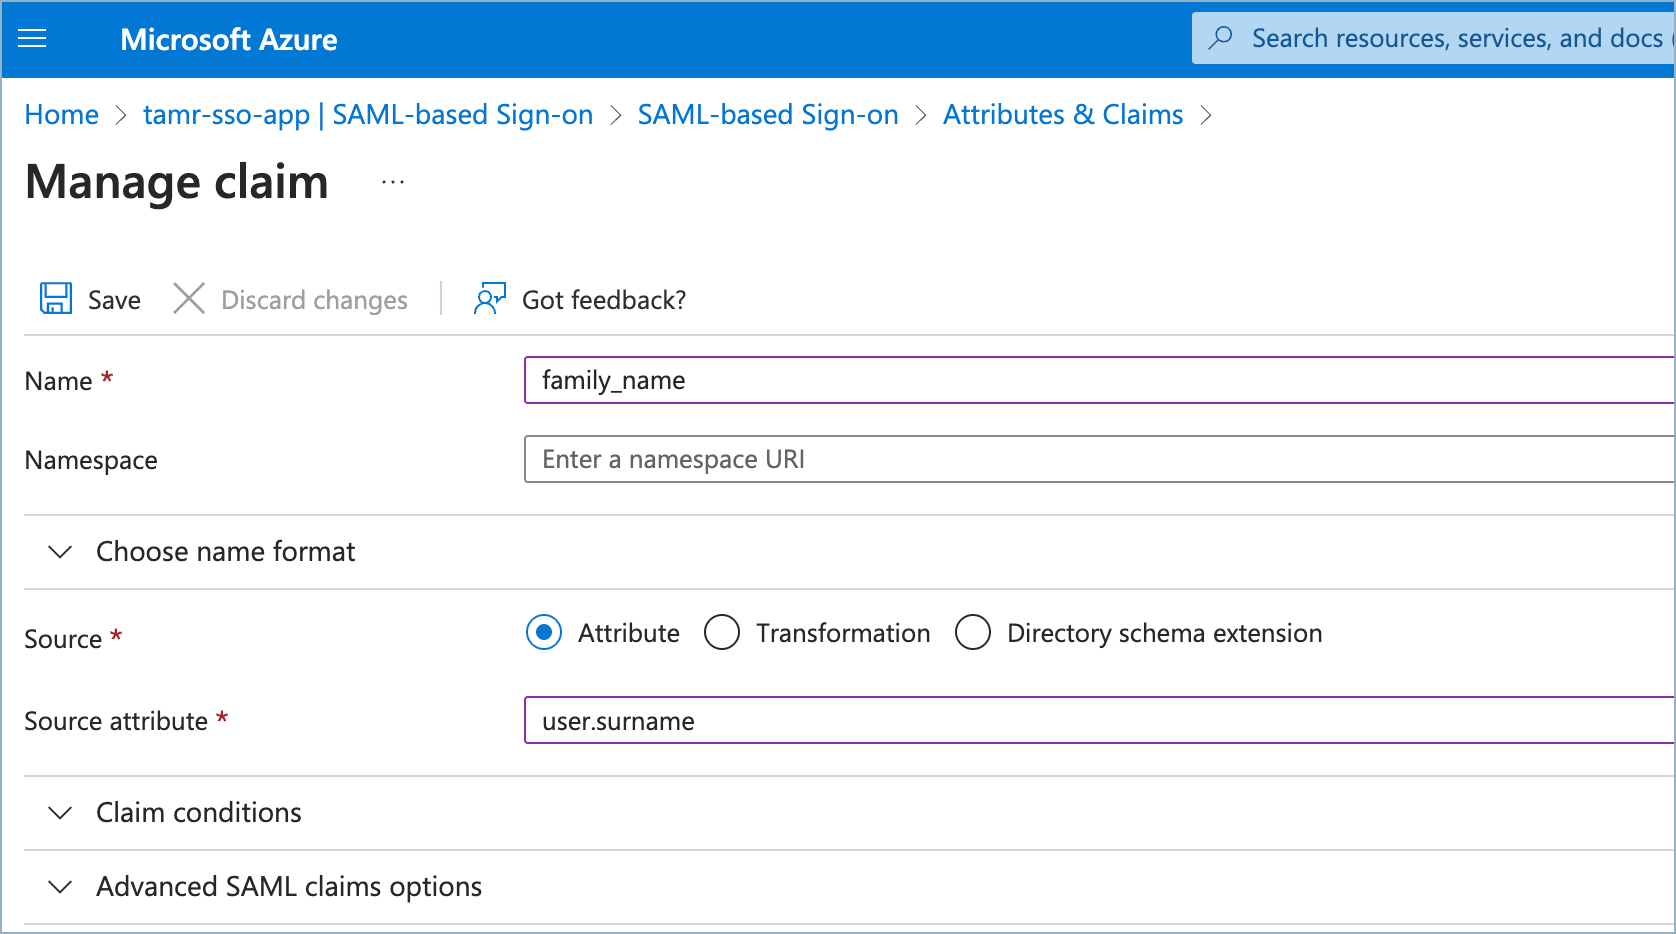
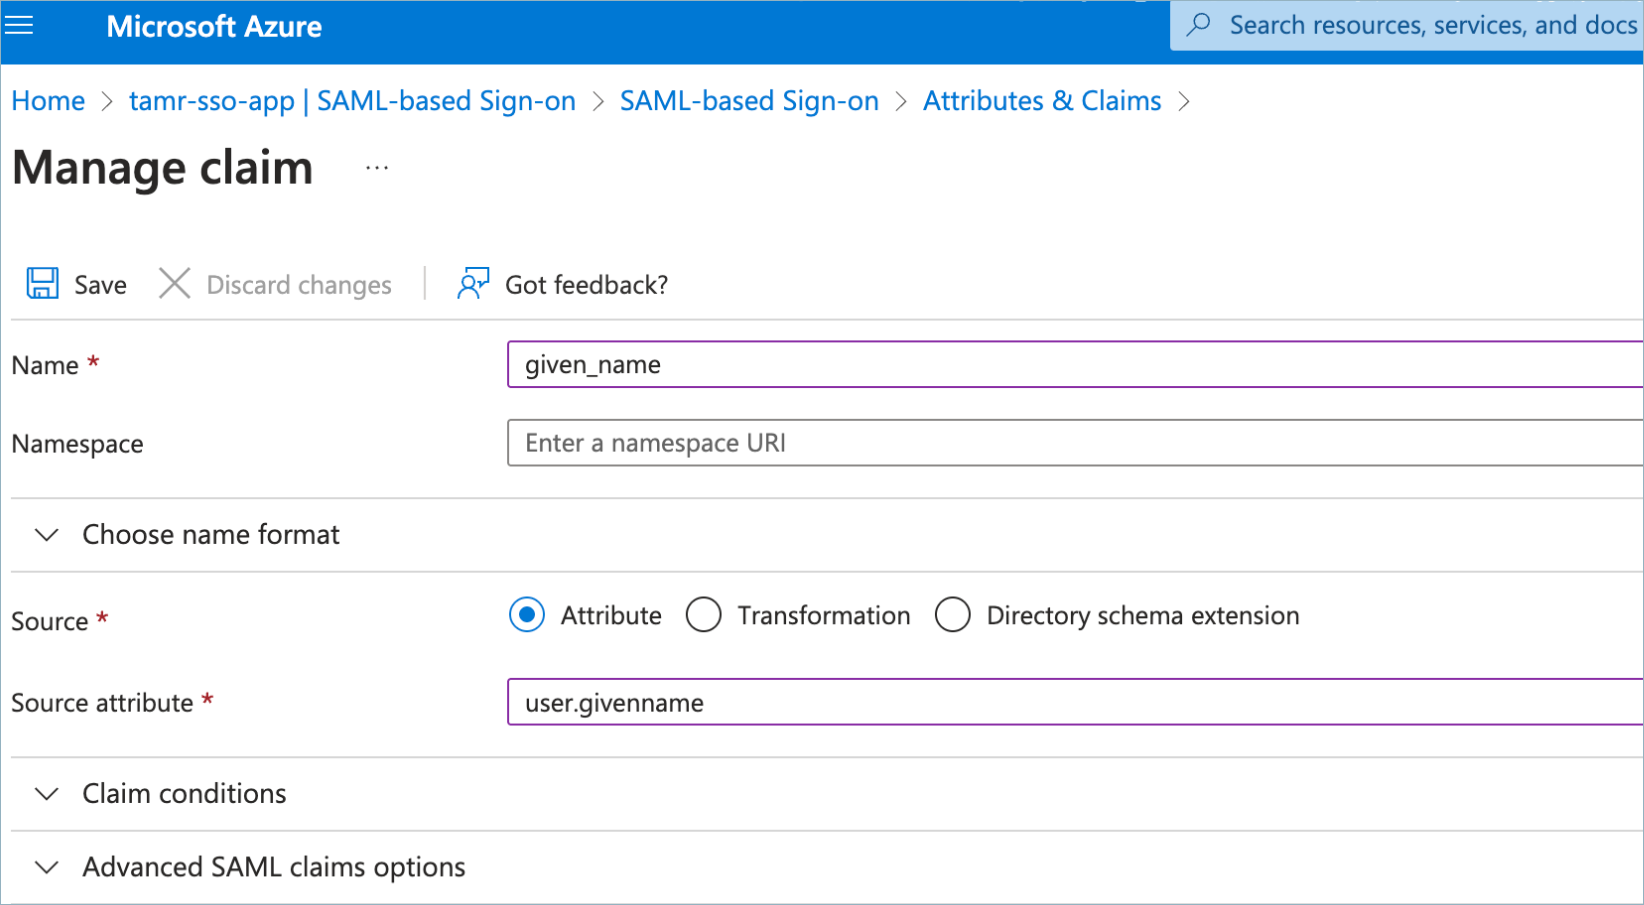
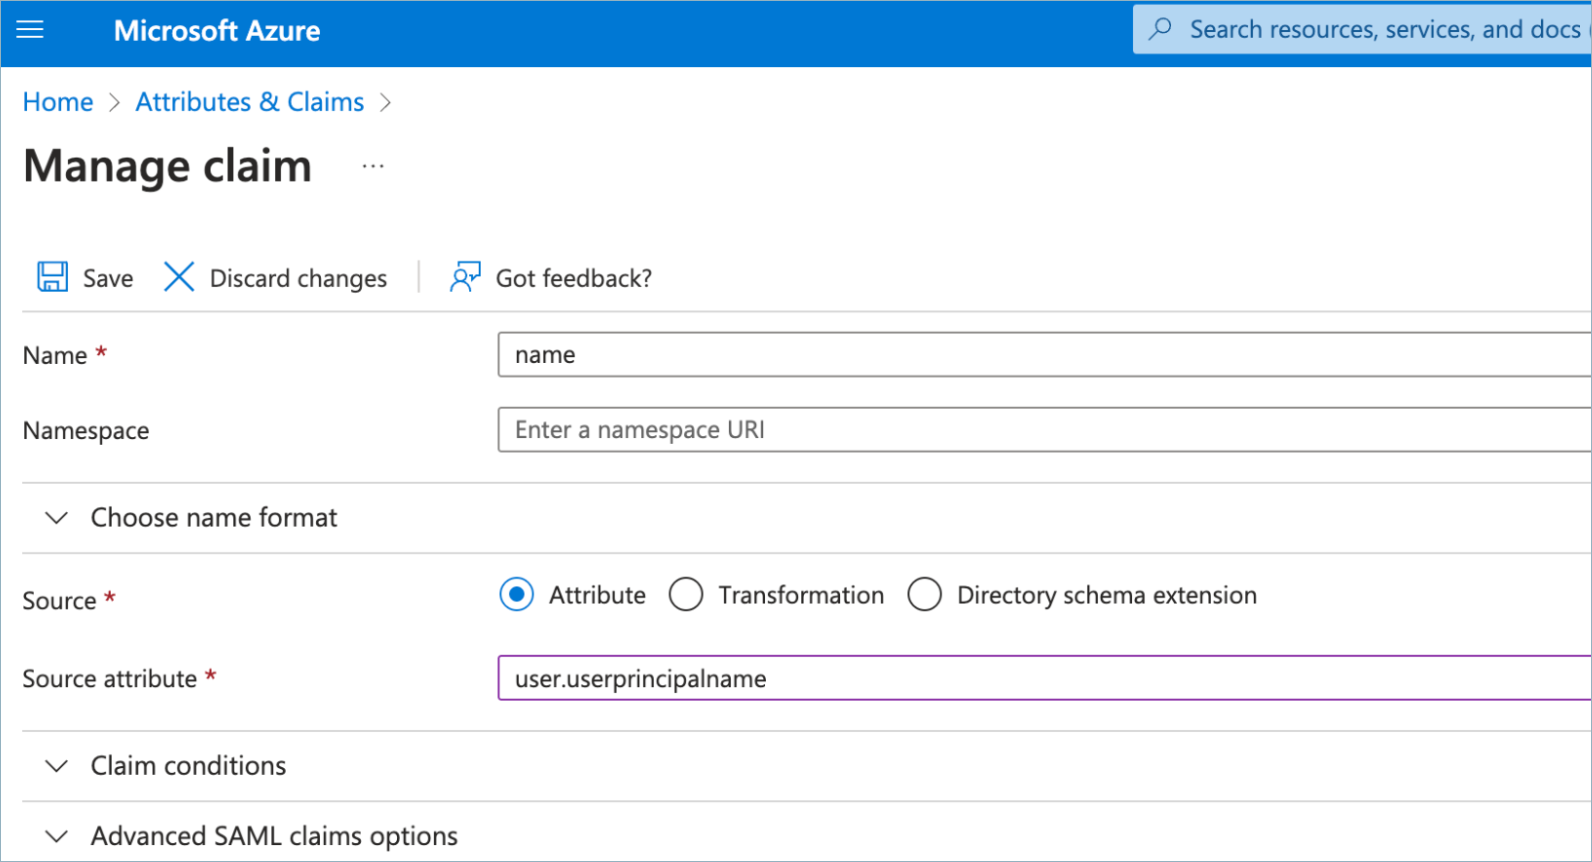
Select the Edit icon in the Attributes & Claims section.
-
Select Add new claim and then add the following fields:
-
Email
-
User Id
-
Family Name
-
Given Name
-
Name
-
Delete all the default claims created under the Additional Claims section.
-
-
Confirm that the SAML application configuration looks similar to the following:
-
Send the following information to Tamr Support ([email protected]) to complete the SSO configuration:
- Download the Certificate (Base64) from the SAML Certificates section.
- Copy the Login URL from Set up <application_name> section.
Updated 2 months ago