
Managing Legacy Publish Destinations
You can add, share, and edit publish destinations.
If you have permission to publish a data product, you can:
- Configure the destinations for publishing and the datasets to publish.
- Select which columns to include in the published datasets.
- Publish the datasets.
Adding a Publish Destination
On the Publish page, you can add destinations to which to publish the Mastered Entities, Source Records by Cluster, and Cluster by Similarity datasets for use in downstream applications.
When adding a publish destination, you specify the cloud storage connection, which datasets to publish, and which columns to include in those datasets.
Required Information for Connection Types
The information required to configure a publish destination depends on the connection type:
| Connection Type | Required Information |
|---|---|
| ADLS Gen2 | - Storage Account Name - Container Name - Storage Access Key |
| Amazon S3 | - Bucket - Region - Access Key ID - Secret Access Key |
| BigQuery | - BigQuery Project - BigQuery Dataset - BigQuery Key File |
| Google Cloud Storage | - Project Bucket - Google Cloud Storage Key File |
| Snowflake | - User - Password - Organization Name - Account Name - Database - Schema - Warehouse |
| File Download | None. Use this connection for local downloads, if you have no other connections. |
Before You Begin:
Before you can add a publish destination, you must have access to one or more connections.
To add a publish destination:
- Open the data product from the home page.
- Select the Publish page.
- Select Add Destination.
- Select an existing connection or create a new one, and then select Next.
- Provide a name and optional description for this destination.
This is the name of the destination as it will appear in Tamr Cloud, and does not affect the name of the published dataset. - Enter any required information for the connection type, then select Next once you are finished.
- Select the datasets to be published to this destination: Mastered Entities, Source Records by Cluster, and Cluster by Similarity. See Datasets Available for Export for information on these datasets.
- For each datasets, specify which columns to include when published. All columns are automatically selected; deselect columns to exclude them. You can sort and filterto find specific columns to include in the dataset.
Note: See the Column Names in Published Datasets section below for information on the names of columns in your published datasets. - Select Save Destination.
Editing and Deleting a Publish Destination
You can edit the destination settings, including connection details, which datasets to publish, and which columns to include in those datasets. These settings include the destination's name, description, output directory, and file type.
To edit a publish destination:
- Open the data product from the home page.
- Select the Publish page.
- Select Edit
 for the publish destination.
 - Edit the destination settings as needed.
- Select Save Destination.
Column Names in Published Datasets
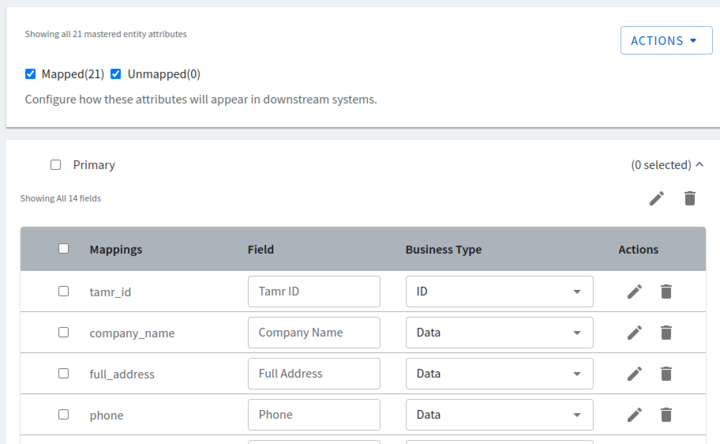
When publishing to ADLS2, S3, or GCS, the names of columns in the published datasets are the display names configured in Tamr Cloud at the time of publishing. Display names are set in the Field column in the Configure Attributes step in the flow, as shown in the image below.
When publishing to Snowflake or BigQuery tables, the names of columns in the published datasets are the original attribute names, as shown in the Mappings column below.
Updated 8 months ago