
Configuring Webhooks
Tamr’s event-driven notification system enables you to keep all of your systems up to date with golden record events, platform events, and curation events in the Tamr System of Record (SOR).
Tamr can publish notifications for these events to a user-specified endpoint (a webhook):
- Golden record events including update delete, merge, unmerge, and enrich events.
- Platform events
- User authentication events including user login and password changes.
- User authorization events when a user attempts to access Tamr Cloud resources.
- Job events when a job state changes.
- Curation queue events including events for new, dismissed, closed, and reopened queue items.
The notifications are published as HTTPS POST requests. The webhook receives these requests and sends messages with the event data to a subscribing application or portal. For example, when a new record is created in the System of Record, Tamr publishes a notification to the specified webhook, which then sends the CREATE event to a consumer application such as a CRM.
Configure webhook integrations in the Admin Center. You can choose whether to subscribe a webhook to record events, platform events, curation events, or all events.
You can also disable (pause) webhooks if needed, and replay record events for a specified time period. You are not able to replay platform or curation events.
Webhook Requirements
Client Webhook Requirements
Your organization must have an HTTPS endpoint that can capture the change data sent from Tamr Cloud via HTTPS POST.
The endpoint service must:
- Support throughput commensurate with the user’s Tamr RealTime authoring throughput. Tamr publishes notifications in near real-time as authoring events occur in the SOR.
- Be capable of processing requests idempotently, which allows Tamr to safely replay the messages from a given time range as needed.
Webhook Integration Requirements
When configuring a webhook integration, you must provide an authorization header value for Tamr to use to access your webhook endpoint. For example:
- A basic auth header (
BasicCreds) - An API key header (
X-API-KEY)
Configuring a Webhook Integration
To add a connection to your webhook endpoint:
- Navigate to Admin Center > Webhooks.
- Select New Webhook.
- Provide the webhook URL and enter each header value as a key/value pair. Choose the Sensitive option to hide the value in the Tamr Cloud UI. Examples of key/value pairs:
Authorization:BasicContent-Type:application/json
- Optionally, disable Use TLS Verification. With TLS verification enabled, Tamr verifies the server's identity through its digital certificate and checks that it is signed by a trusted certificate authority. You might disable this setting, for example, to allow self-signed certificates or if your system is using certificates signed with older algorithms.
- Optionally, enable Use Token Authentication and enter the following:
- Token Provider URL: A request will be made to this URL to obtain a token, which will then be sent as the bearer token in the Authorization header of the webhook request.
- Grant Type: The default value is
client_credentials. - Content Type: Choose either
application/x-www-form-urlencodedorapplication/json. - Client ID and Client Secret: Client credentials to use when making the request to the token provider. Choose whether to include these credentials in the header.
- If using token authentication, optionally enable Use JWT Assertion and enter the following:
- JWT Private Key: This value is visible only when initially configuring the webhook connection. It is hidden when editing this connection.
- JWT Audience: The resource server that is the audience receiving the JWT.
- JWT Time-to-Live (seconds): The amount of time in seconds to allow for validating JWT expiration time and issued at claims.
- JWT Algorithm: Tamr supports only RSA_256.
- If using token authentication, optionally add OAuth token Scopes for access.
- Choose to subscribe to Record Change Events, Platform Events, and/or Curator Hub Events for this webhook.
- Select Add to save the webhook.
Disabling (Pausing) Webhooks
You can disable webhook event notifications on the Webhooks page. This is useful, for example, to avoid sending a large number of events to the webhook when testing a configuration change.
Re-enable the webhook when you are ready to resume sending event notifications.

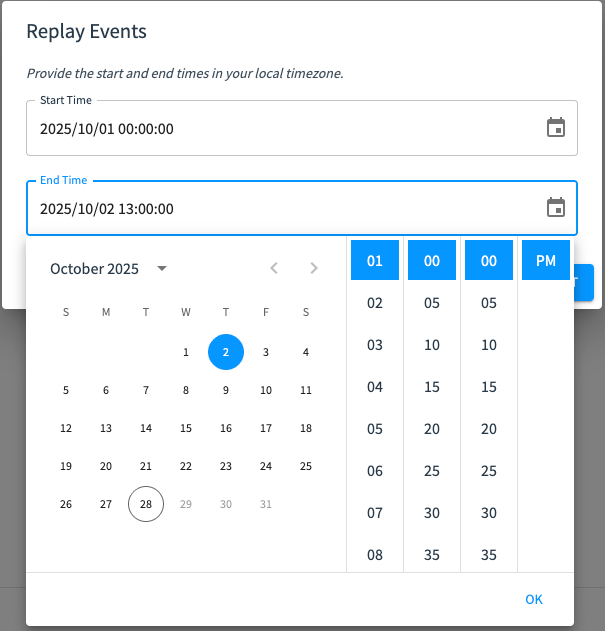
Replaying Webhook Record Events
You can replay record events for a specified time period - ensuring you don’t miss any events if the webhook becomes unavailable or if the connection to Tamr Cloud is otherwise interrupted.
If you have configured multiple webhooks, events during the specified time period are replayed for all webhooks.
To replay events:
- On the Webhooks page, choose Replay Events
- Select the start and end dates and times in your local timezone and submit the job.
Updated 2 months ago