
Adding and Configuring a RealTime Data Product
Limited ReleaseRealTime data products are in limited release. Some functionality is still in development and is subject to change. If you are interested in using these data products, contact Tamr Support ([email protected]).
Follow the instructions in this topic to add and configure:
- RealTime B2B Customers Data Product
- RealTime B2C Customers Data Product
- RealTime Contacts Data Product
- RealTime Healthcare Providers Data Product
Before Adding the Data Product
- Review the default schema for your data product to:
- Learn which attributes are most important for identifying duplicate records.
- Plan how you will map your source attributes to the schema.
- Understand the default record consolidation rules for each attribute, which determine how the golden record value will be selected from clustered source records.
- Add your source data to Tamr. See Adding Source Data.
Initial Configuration
Step 1: Add the Data Product
To add a data product:
- On the Data Products page, select Add Data Product.
- Choose the type of data product you want to add, and then select Next.
- Enter a name and optional description. Names must be unique.
- If needed, update the singular and plural name for the entities in the data product. These values are used to refer to the data product entities throughout the UI. You can change these to better reflect the data you are mastering.
For example, the default values for the entities name in a B2B Customers data product are Customer and Customers. You might update them to "Supplier" and "Suppliers" or "Provider" and "Providers" - Choose Create.
The configuration page for the new data product opens. The default data product configuration, including the default unified schema and record consolidation rules, is listed in Pending Changes. Do not apply these changes yet.
Step 2: Add Sources and Map the Schema
To add sources and map schema:
-
In the Sources & Schema Mapping card, select Review All. The Sources & Schema Mapping page opens.
-
Select and add a source dataset from the Add Sources dropdown. Repeat to add each source for this data product.
-
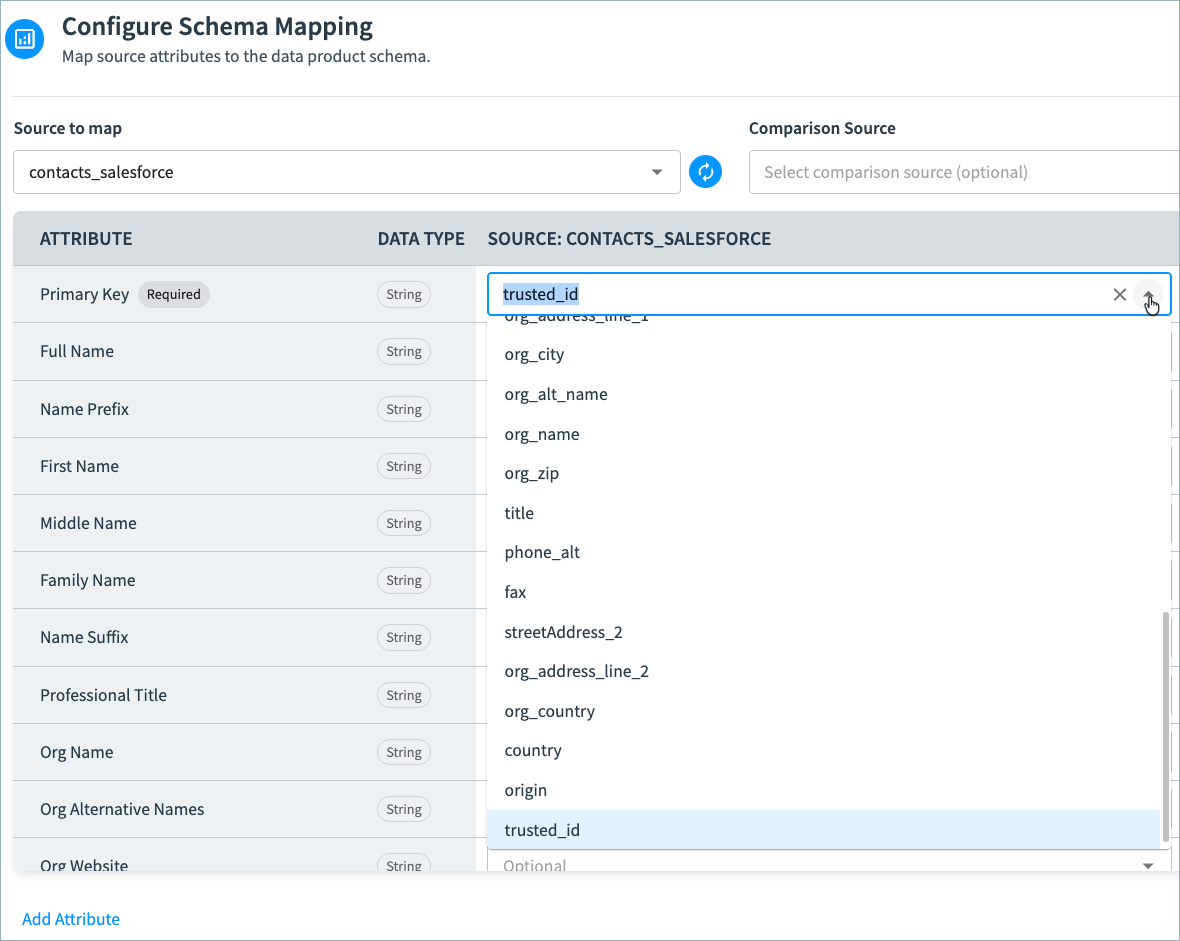
In the Configure Schema Mapping section, select a source to map its fields to the attributes in the data product schema. Tamr automatically maps fields when it identifies a high-confidence match.
-
Map a field in your source dataset to as many fields in the data product schema as possible.
-
For data products that include a Full Name attribute (RealTime B2C Customers, RealTime Contacts , and RealTime Healthcare Providers), if you have not mapped an attribute to Full Name for a given source, you can derive the value for this attribute from a combination of other Name fields in that source. This ensures that a Full Name is available in your golden records and 360 pages.

-
Select Derive in the Full Name row. The Configure Derivation section opens, in which you can choose which Name attributes will be used in the Full Name value, and their order.
-
In the Configure Derivation section, reorder the Name attributes as needed and remove any attributes you do not want to include in the Full Name value.
-
Select Apply Derivation.
-
If you need to edit the configuration, select Edit derivation in the Full Name row. You can also clear this derivation if need (for example to map a source field in the dataset to this attribute).

-
-
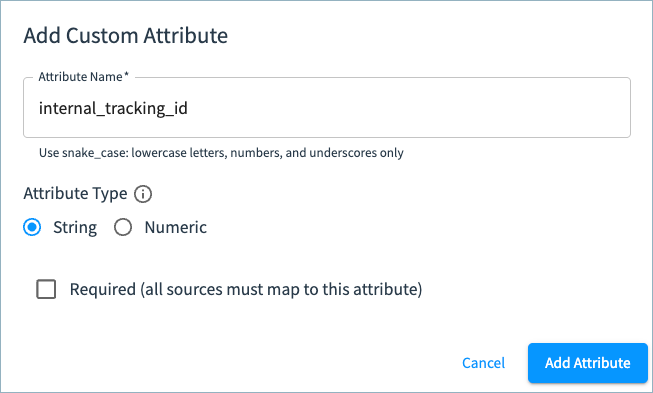
If needed, add and map custom attributes by selecting Add Attribute below the defined schema. Enter a name for the attribute and select the data type. If this attribute is required (meaning that all sources must map a field to this attribute), select the Required checkbox.
-
Select Save Draft when you have completed schema mapping.
-
Repeat these steps to map all of your source datasets to the data product schema.
Tip: If you are mapping multiple datasets, you can use the Comparison Source feature to align schemas by viewing two sources simultaneously.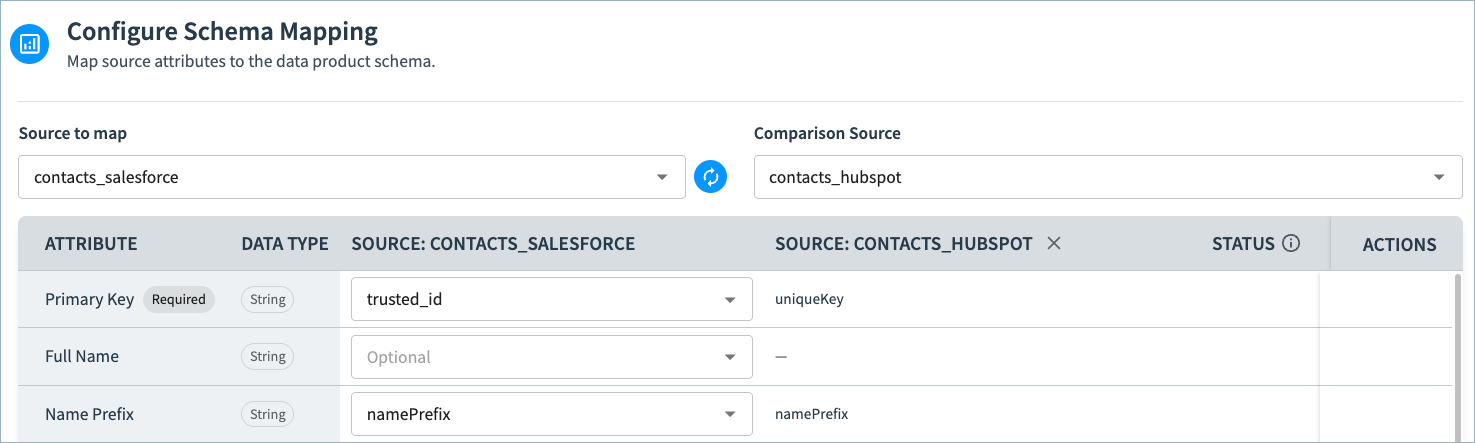
-
Select Save Draft and then navigate back to the data product configuration page.
(Optional) Step 3: Protect Sensitive Data
Your data product might include sensitive information such as birth date, national IDs, email addresses, and so on, that you may not want all users to access. You can choose to hide sensitive data from users with the data product viewer role. See Protecting Sensitive Data in RealTime Data Products.
Step 4: Deploy Your Draft Configuration
When you have completed the initial draft data product configuration, you deploy the draft to update the configuration with your changes.
Deploying also creates an empty System of Record table for your data product and initializes workflows you can use to populate and update the data in the SOR.
To deploy the draft:
- In the Pending Changes section, select Validate.
Correct reported configuration errors and re-validate if necessary. - Select Apply Draft and Deploy.
- Provide a description for this version of your data product configuration and select Deploy.
Step 5: Run the Resolve Workflow
The Resolve Source Changes with the System of Record workflow populate the data in the SOR based on the latest data product configuration. This workflow deduplicates your source records and creates your golden records.
To run the workflow: Select the Run icon for this workflow in the Workflows list.
Tamr displays a real-time run status and updates with the timestamp of the last successful execution upon completion.
Step 6: Review Your Data
When the workflow completes, you can review your records by:
- Navigating to the 360 pages for this data product from the Browse menu.
- Navigating to the golden records table by selecting Curator Hub > Records.
See Searching for Records in the System of Record for information about navigating to records.
Fine-Tuning Golden Record Consolidation Rules
Record consolidation rules determine the values selected for golden record attributes. Each record consolidation rule is a set of filters, or conditions, that determine the records in a cluster from which Tamr can select the golden record value. Each data product has a default record consolidation rule for each attribute as well as a final value condition as a tiebreaker.
You can adjust the rule for each attribute to ensure the selected value is appropriate for your downstream users and systems. Within each rule, you can specify a number of conditions that are applied in order to filter the records.
Step 1: Adjust Record Consolidation Rules for Golden Records
Recommended: If you have already run the Resolve workflow, you can preview rule changes on a specified record before deploying the changes to all records in your SOR. Identify a record to use for preview and copy the record ID.
To adjust the record consolidation rules:
-
On the Data Products page, select Configure Data Product on the data product card.
-
In the Golden Records card, select Review All. The Consolidation Rules page opens.
-
Review the current rules for each attribute. You can expand each rule individually to see all rule conditions, or select Expand All.
-
Select Edit for the rule you want to adjust.
-
Select Add Condition to add a new simple condition or specify source priority.
-
Either:
- Add condition on the Simple Condition tab. Select the Condition Type and related attribute, and configure any other necessary settings.
- Adjust source priority on the Source Priority tab. On this tab, you can configure priority tiers to select records from your preferred sources. You can add one or more sources to each tier.
See About Record Consolidation Rules for RealTime Data Products for more details on these conditions and source priority.
-
Select Add Rule to add this condition.
-
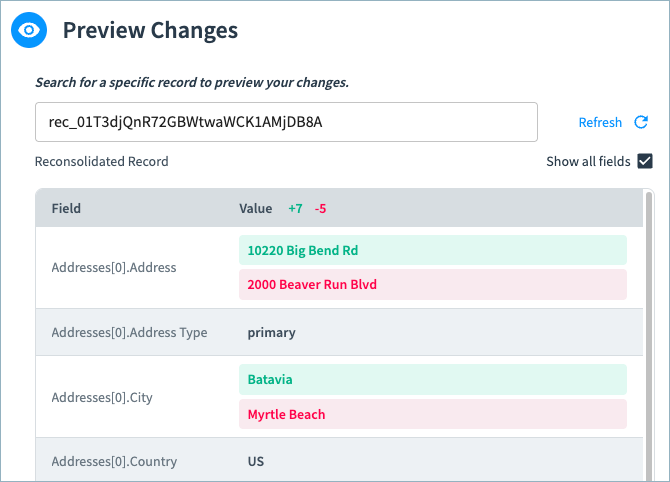
In the Preview Changes section, enter the record ID of a record to use to preview the updated rules. In the preview, new record values are show in green and the original values are shown in red.
-
Select Save Draft when you have finished updating the rule.
-
Repeat these steps to update additional rules.
-
Navigate back to the data product configuration page.
Step 2: Deploy Your Draft Configuration
When you have completed the changes to your record consolidation rules, deploy the draft to update the configuration with these changes.
After deploying the configuration, new and updated golden records are consolidated using the new rules.
To deploy the draft:
- In the Pending Changes section, select Validate.
Correct reported configuration errors and re-validate if necessary. - Select Apply Draft and Deploy.
- Provide a description for this version of your data product configuration and select Deploy.
(Optional) Step 3: Run the Reconsolidate Records Workflow
The Reconsolidate Records workflow applies the updated consolidation rules to all golden records in your SOR.
Use this workflow if you want to recalculate all golden records using the updated rules.
In the Workflows section, select the Run icon for this workflow.
Tamr displays a real-time run status and updates with the timestamp of the last successful execution upon completion.
Set up Curation Queues
Create curation queues for managing review of suggested duplicates and suggested golden record edits. See Configuring Queues.
Set up Views for Curators and Data Publishing
You can set up different data views for curation and publishing. In each view, choose which data product attributes to include in the view and their order. You can also specify display names for the attributes:
- In Curator Hub, the display name is shown as the attribute name in the golden records table.
- When publishing data, the display name is used as the attribute name in the published results.
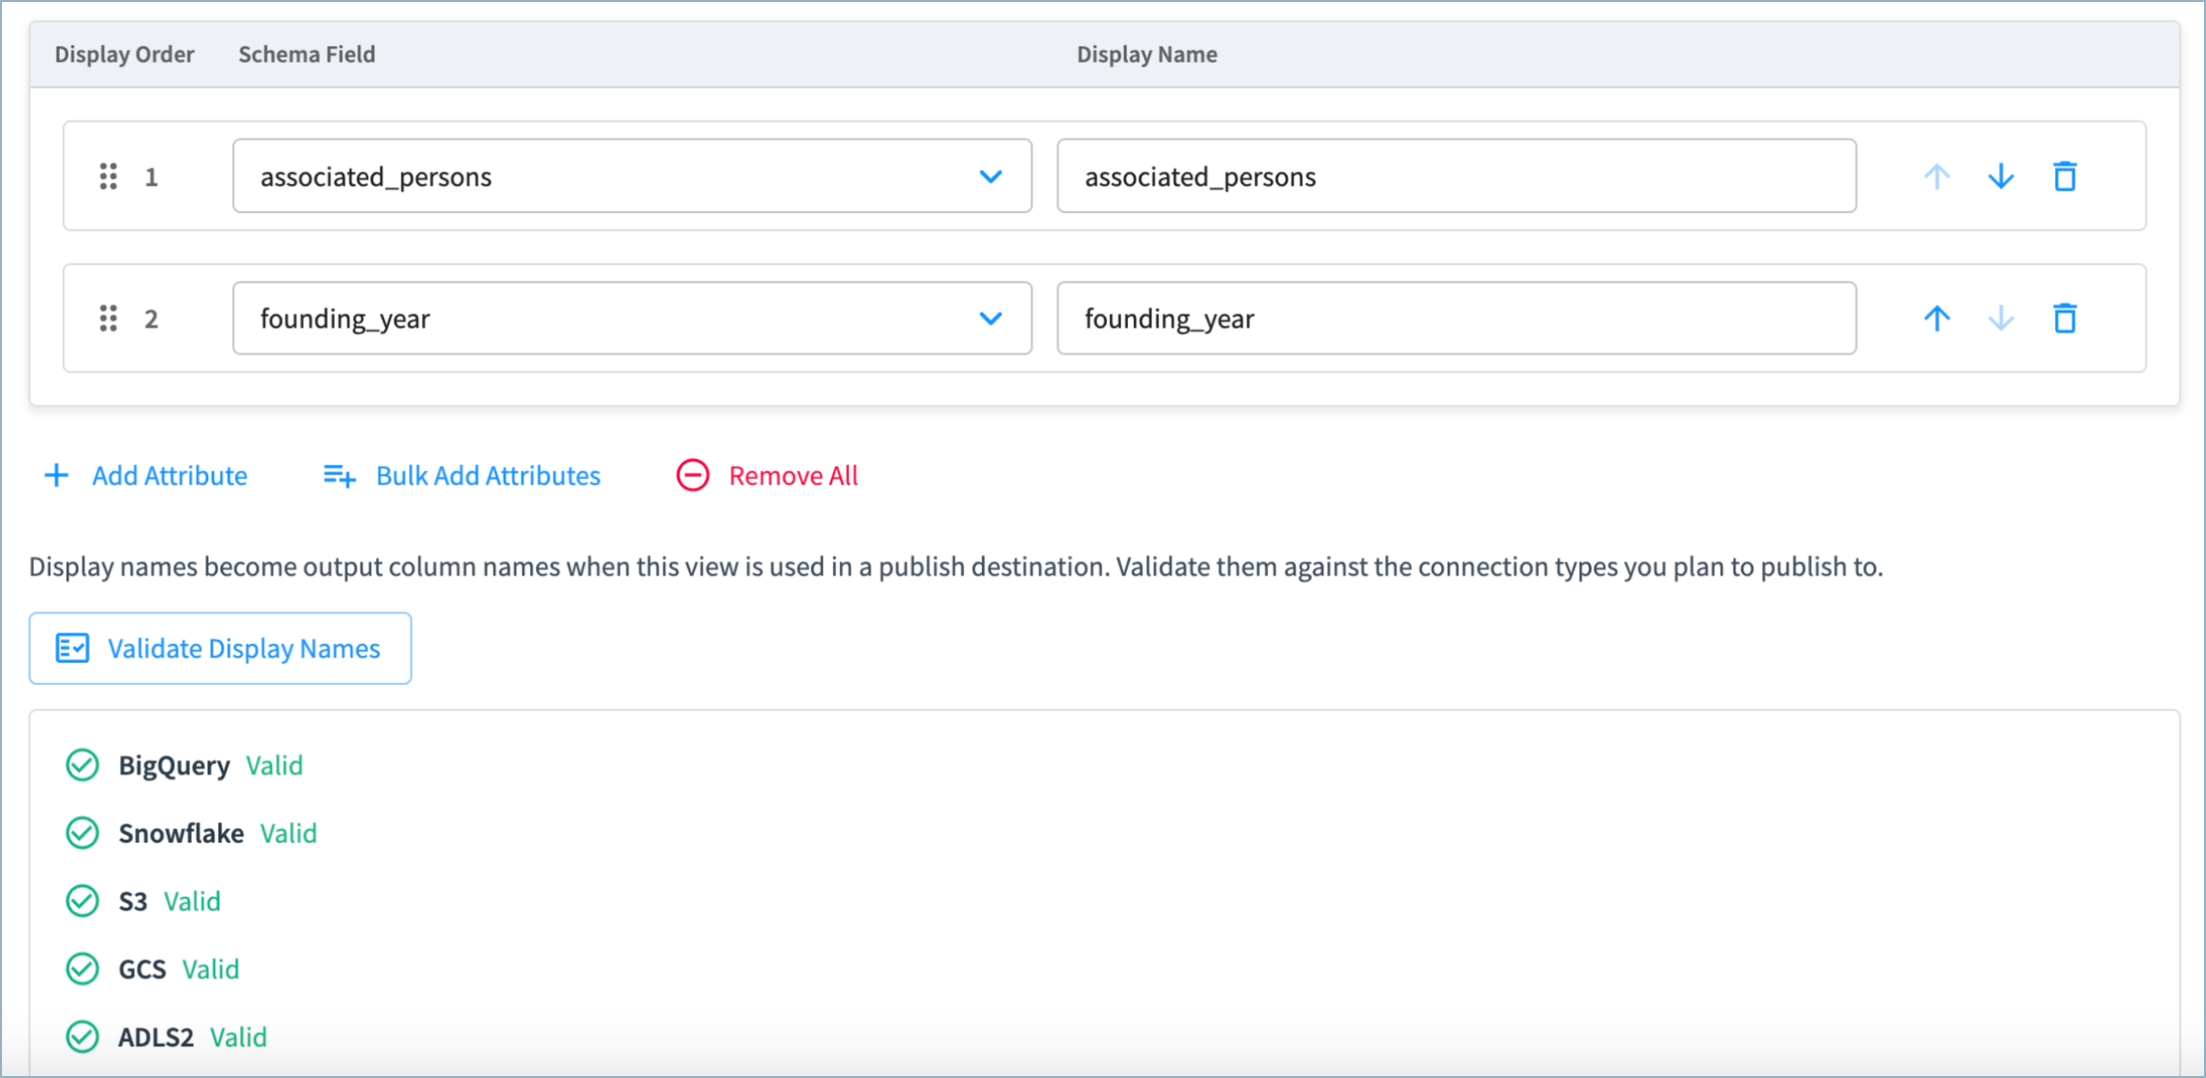
By default, display names are lower case with words separated by underscores. The default display names are valid for all publishing destinations (BigQuery, Snowflake, S3, GCS, and ADLS2). If you change the display names, use the Validate Display Names option to ensure that the attribute name formats are valid for your publish connection.
To configure views:
-
On the Data Products page, select Configure Data Product on the data product card.
-
In the Views card, select Review All. The Views page opens.
-
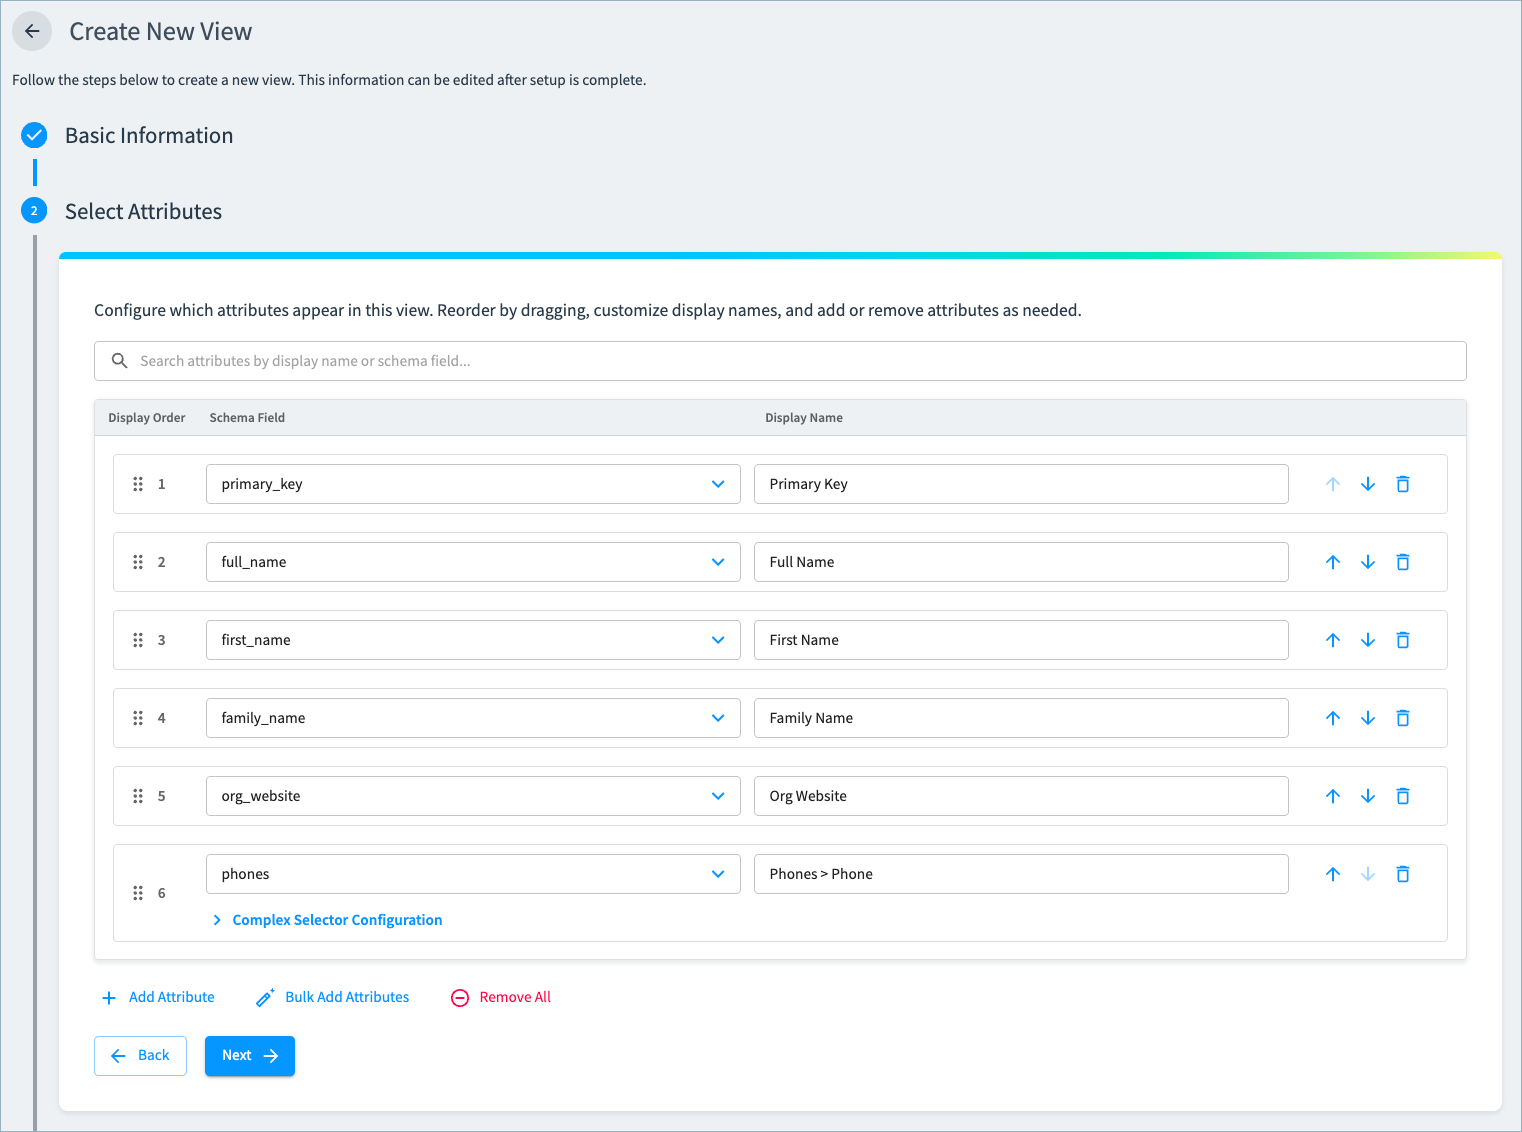
Select Create New View.
-
Enter a display name and description for this view. Select Next.
-
Add attributes to the view individually, or add in bulk by selecting Bulk Add Attributes and then selecting the attributes to include in the view.
-
Leave the default display name, or enter a new display name for each attribute.
-
Reorder the attributes as needed for the view.
-
If you will be using this view for a published dataset, select Validate Display Names to check that the display names are valid for your connection type.
-
Select Next.
-
Preview a sample of your records with this view applied. If needed, select Back to adjust the attributes which are included, their order, or their display names.
-
Select Save.
-
Create additional views as needed, and then navigate back to the data product configuration page.
-
In Pending Changes, Validate your configuration changes and then select Apply Draft and Deploy. Once deployed, the views are available in Curator Hub and when configuring destinations.
Updated about 1 month ago