
Configuring Views for Curation and Publishing
You can set up different data views for curation and publishing. In each view, choose which data product attributes and attributes provided by enrichment sources to include in the view and their order. You can also specify display names for the attributes:
- In Curator Hub, the display name is shown as the attribute name in the golden records table.
- When publishing data, the display name is used as the attribute name in the published results.
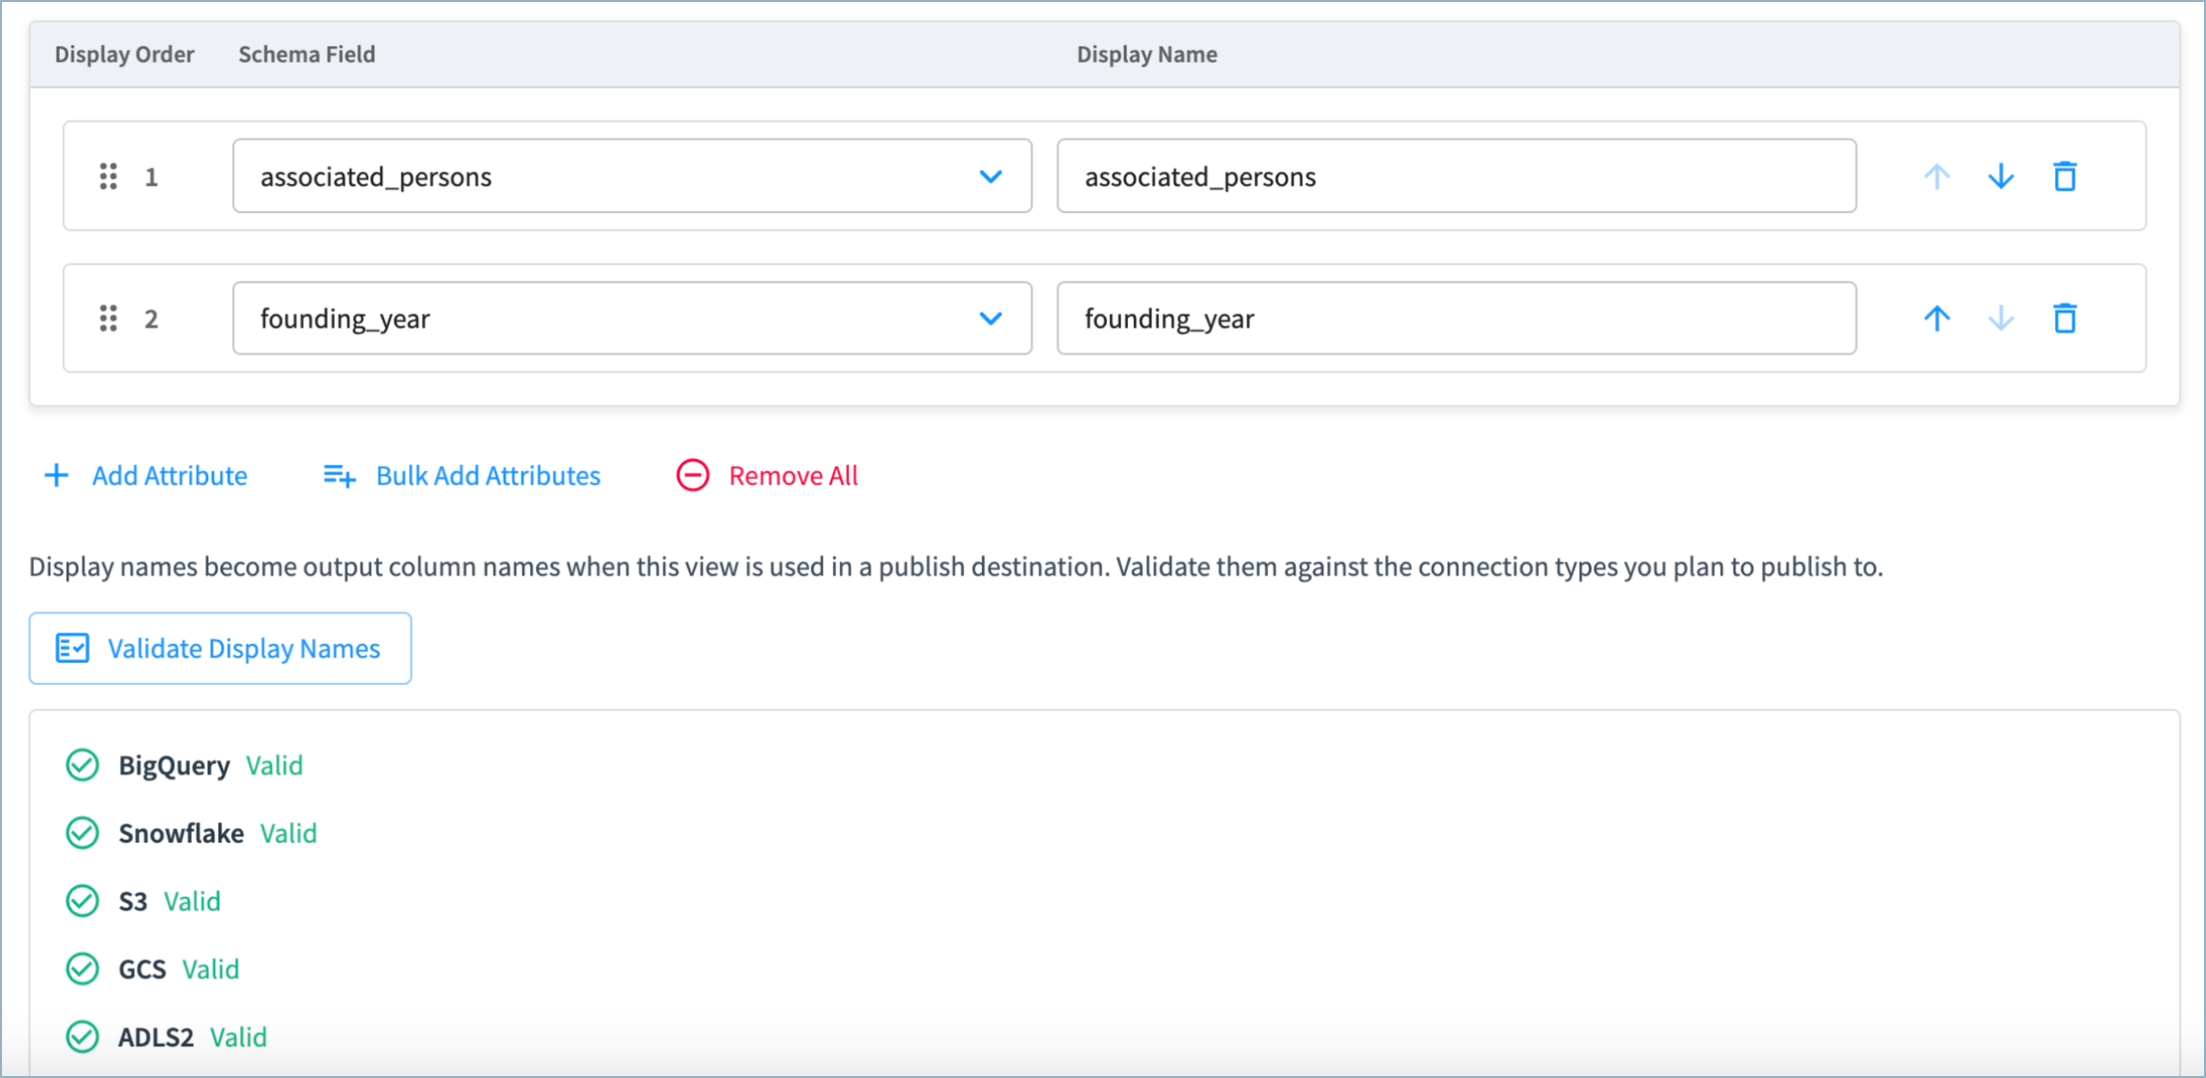
By default, display names are lower case with words separated by underscores. The default display names are valid for all publishing destinations (BigQuery, Snowflake, S3, GCS, and ADLS2). If you change the display names, use the Validate Display Names option to ensure that the attribute name formats are valid for your publish connection.
You can also choose whether to display source values after they have been standardized by configured reference data standards (post-standardized values), or the original, non-standardized source values (pre-standardized values). This is applicable for:
- Views used when publishing source records.
- Views used in Curator Hub source record curation.
Important Known Issues for Publishing Array Values: When configuring record consolidation rules to determine values in your golden records, one option is to include all distinct values for the attribute (Collect Distinct). Currently, if you include golden record attributes with this consolidation setting in a view, the values are not included in the published golden record dataset.
To configure views:
-
On the Data Products page, select Configure Data Product on the data product card.
-
In the Views card, select Review All. The Views page opens.
-
Select Create New View.
-
Enter a display name and description for this view.
-
Applicable for views used in source record curation and/or source record publishing: Select whether to include source values after they have been standardized by configured reference data standards (post-standardized values), or the original, non-standardized source values (pre-standardized values).
-
Select Next.
-
You can either add attributes to the view individually, or add in bulk
-
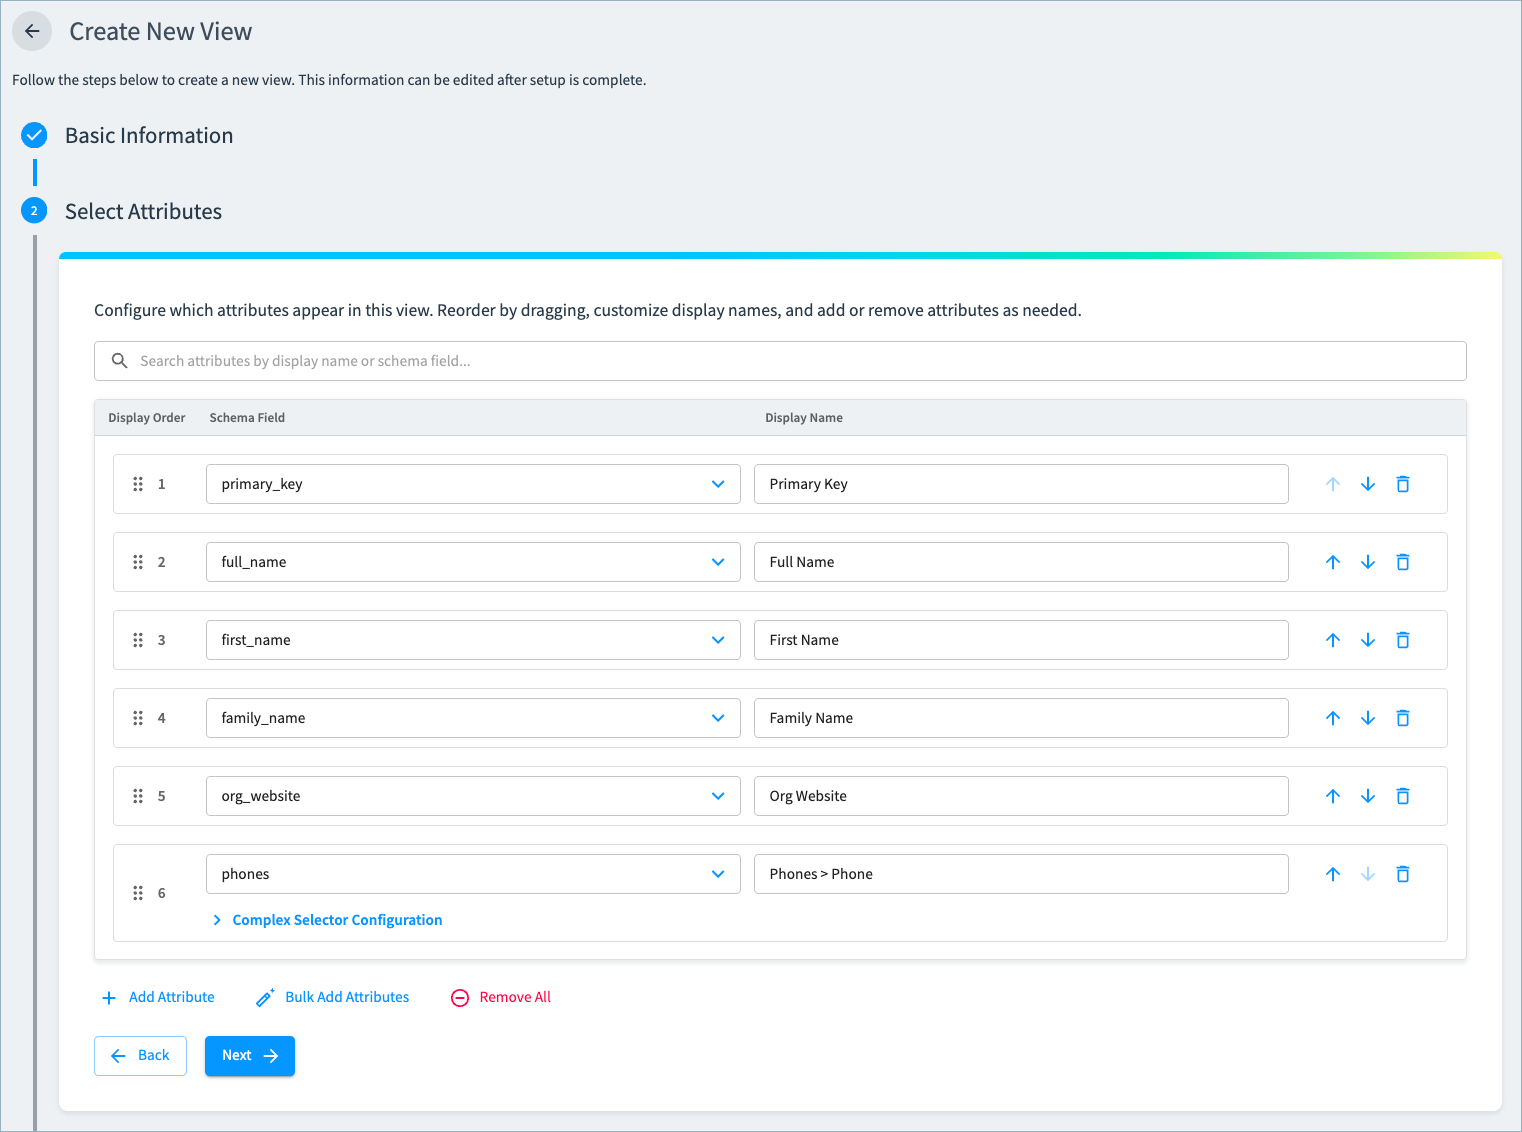
To add an individual attribute, select it from the Schema Field dropdown list.
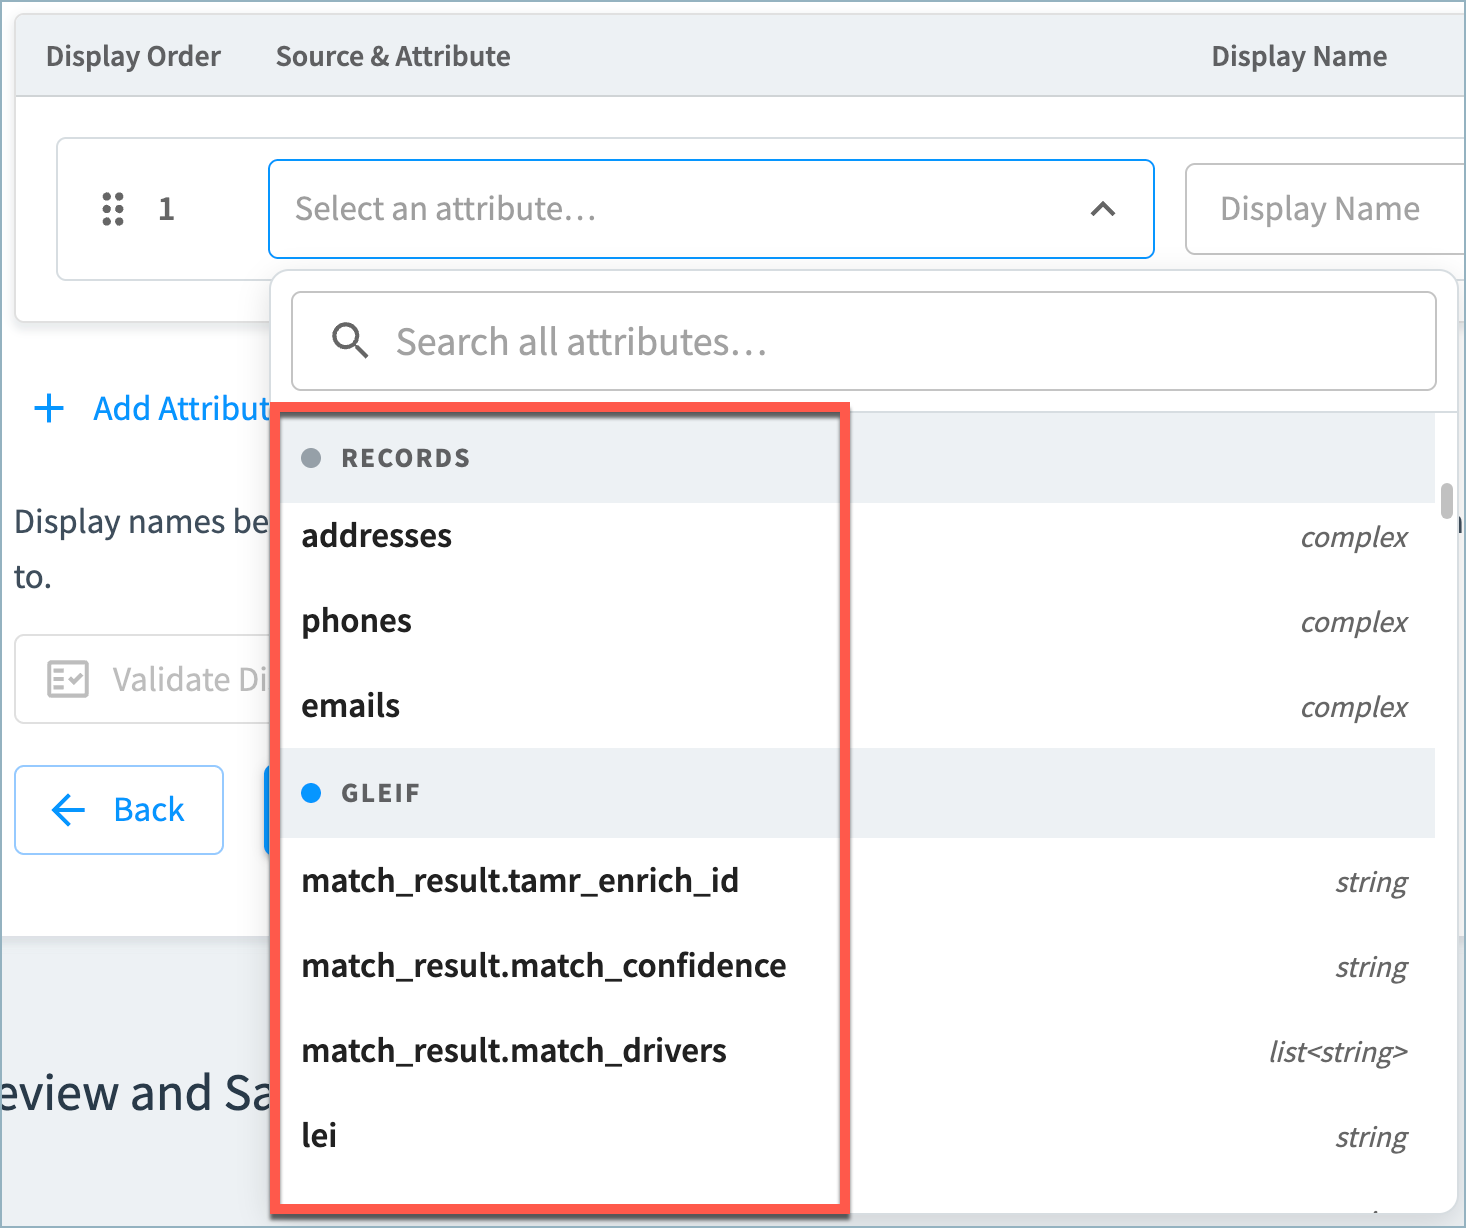
If you have configured enrichment in your data product, you can select attributes provided by enrichment sources in the view. In the example below, the attributes in the Records section are the attributes in the defined schema. The attributes in the GLEIF section have been provided by GLEIF enrichment.
-
To add attributes in bulk, select Bulk Add Attributes and then select the attributes to include in the view.
If you have added enrichment sources to your data product, you can include them in the view. These attributes are available below the Records attributes in the Bulk Add Attributes dialog box.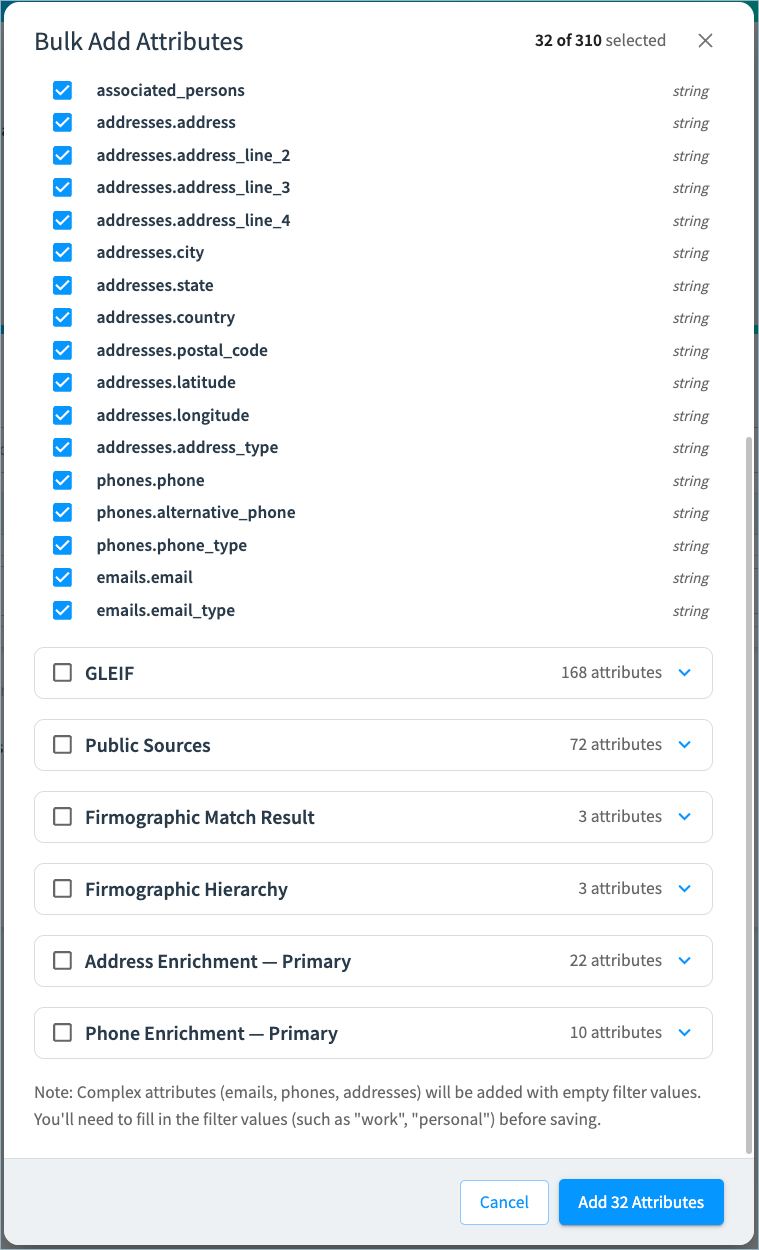
-
-
Leave the default display names, or enter a new display name for each attribute.
-
Reorder the attributes as needed for the view.
-
If you will be using this view for a published dataset, select Validate Display Names to check that the display names are valid for your connection type.
-
Select Next.
-
Preview a sample of your records with this view applied. If needed, select Back to adjust the attributes which are included, their order, or their display names.
-
Select Save.
-
Create additional views as needed, and then navigate back to the data product configuration page.
-
In Pending Changes, Validate your configuration changes and then select Apply Draft and Deploy. Once deployed, the views are available in Curator Hub and when configuring destinations.
Updated about 1 month ago